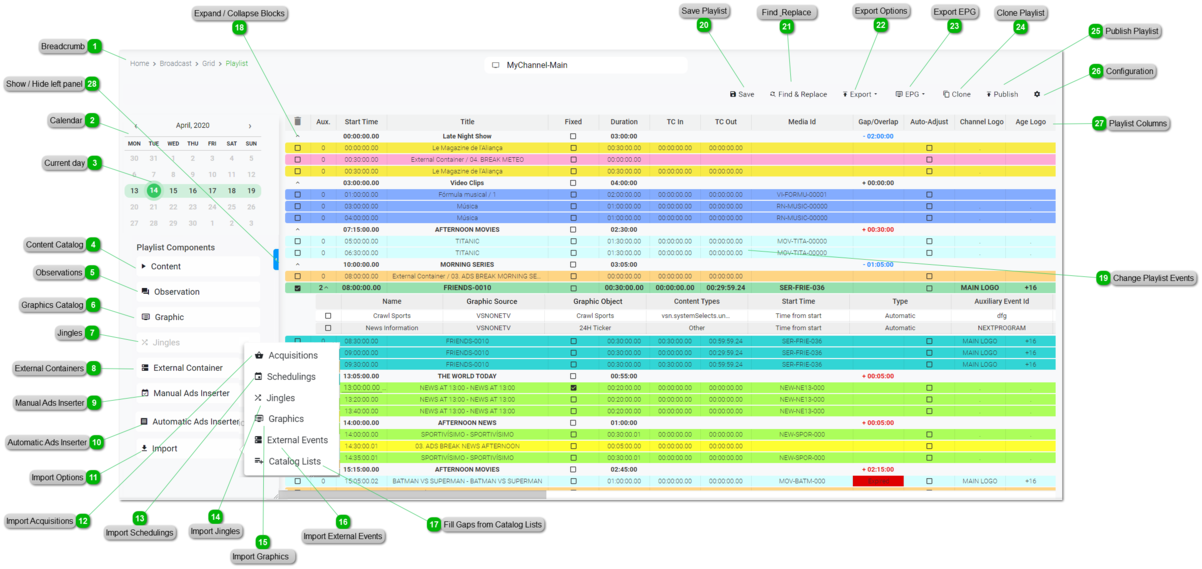
You can add graphics to any media event. To do so:
Select a main event in the playlist by one click over an event in the block.
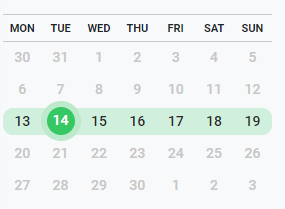
Click on
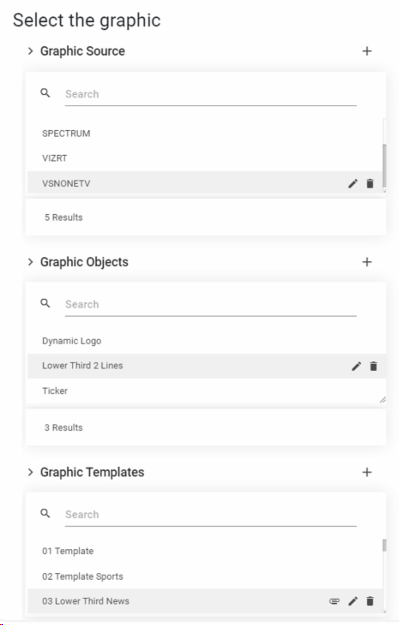
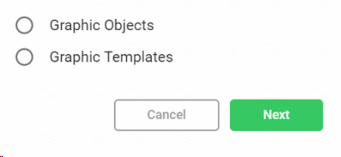
In the dialog panel, select one of the options:
If you select Graphic Objects:
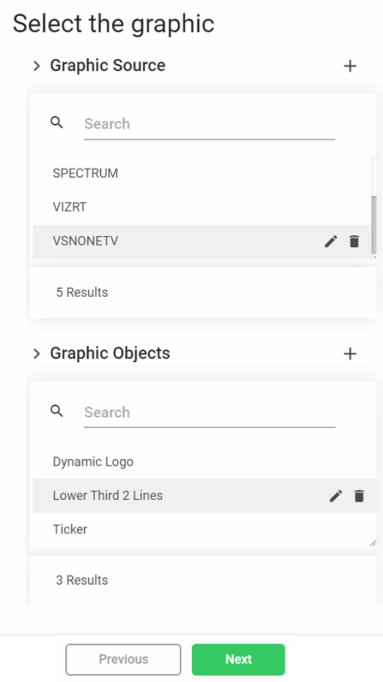
Click
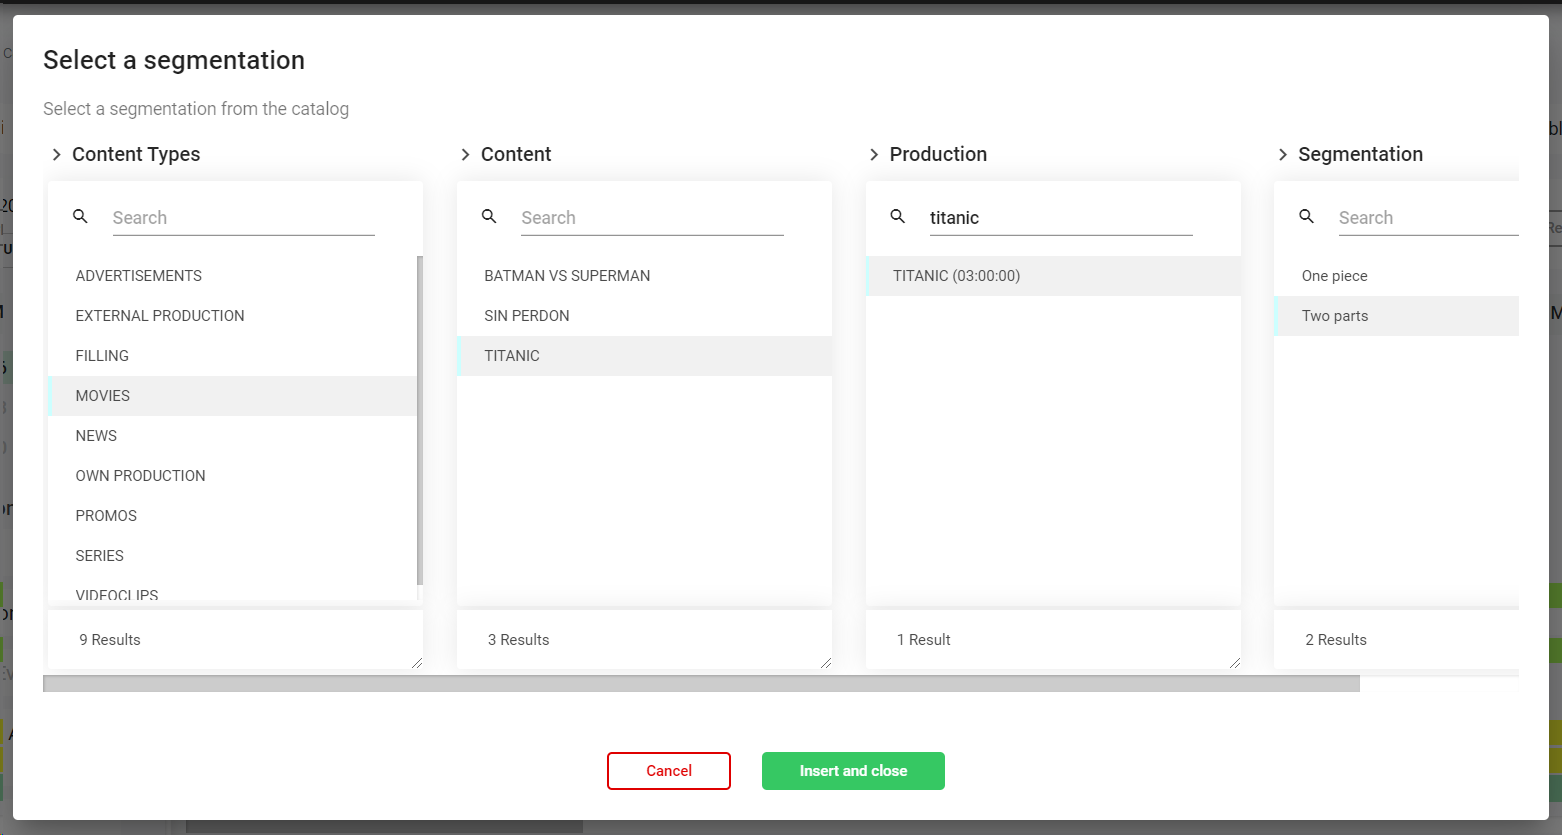
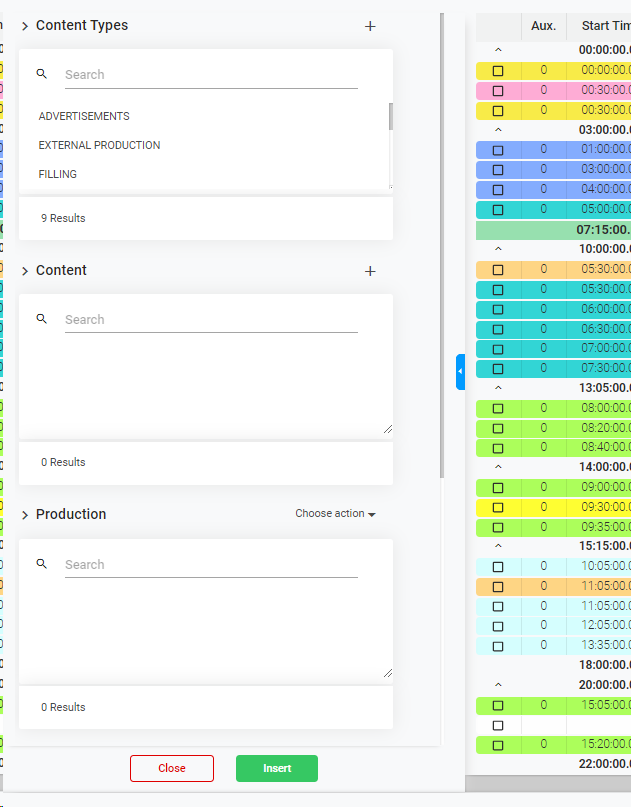
Select the graphic objects from the catalog:
Click
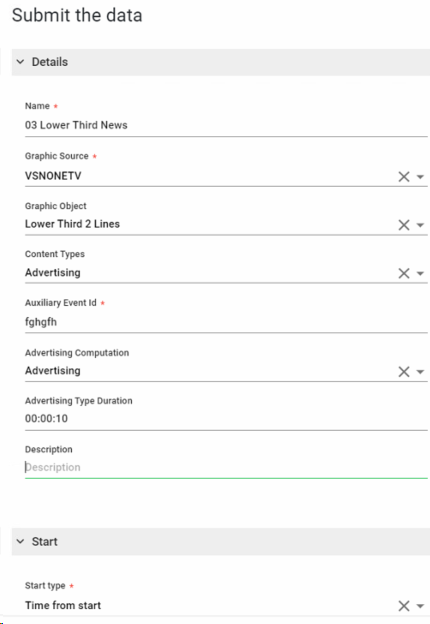
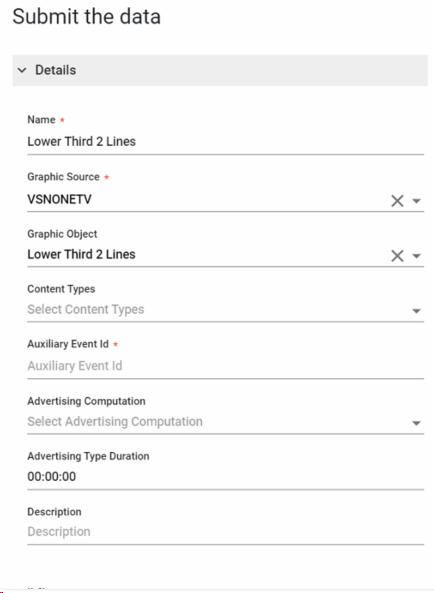
Introduce (at least) all the mandatory parameters of the graphic object:
Click on to add the graphic or to cancel the operation
If you selected Graphic Templates
Click
Select the graphic template from the catalog
Click
Modify, if needed, the parameters of the graphic object template:
Click on to add the graphic or to cancel the operation
Upon clicking the new graphic will be inserted in the main event
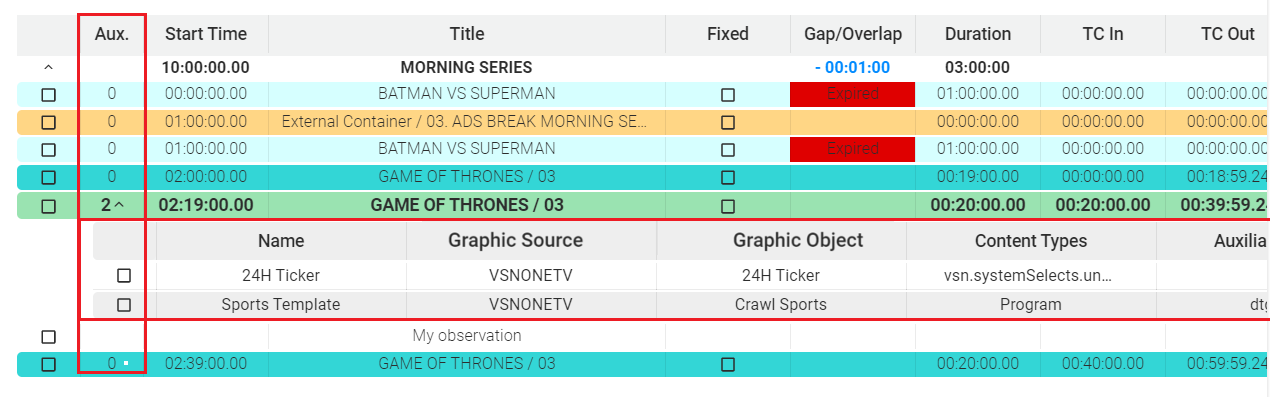
Once in the block, you can edit the graphics by double click on any column of the row. This will open the metadata form where you can modify the parameters and save them.
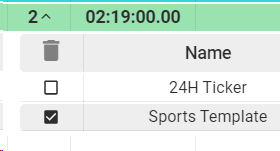
Once in the block, you can delete the graphics by selecting them and lick the icon:
This option will be activated only when selecting a block name.
To add Pre-Roll and/or Post-Roll Jingles into a block in the playlist, follow these steps:
1. Select the first item of the block, that is the Block Name.
2. Click on
3. The Jingles Configuration panel will be opened. You must select the Jingles Type (Pre-Roll or Post-Roll)
4. In the catalog will only appear the Content Types set as "Filling". Select the productions (segments) from the catalog that you want to use as Pre-Roll or Post-Roll Jingles, and click
5. You can repeat the same process to add more Jingles into the block.
6. Click to save the block.
The Jingles will be anchored to the block and they won't be able to be moved within their block.
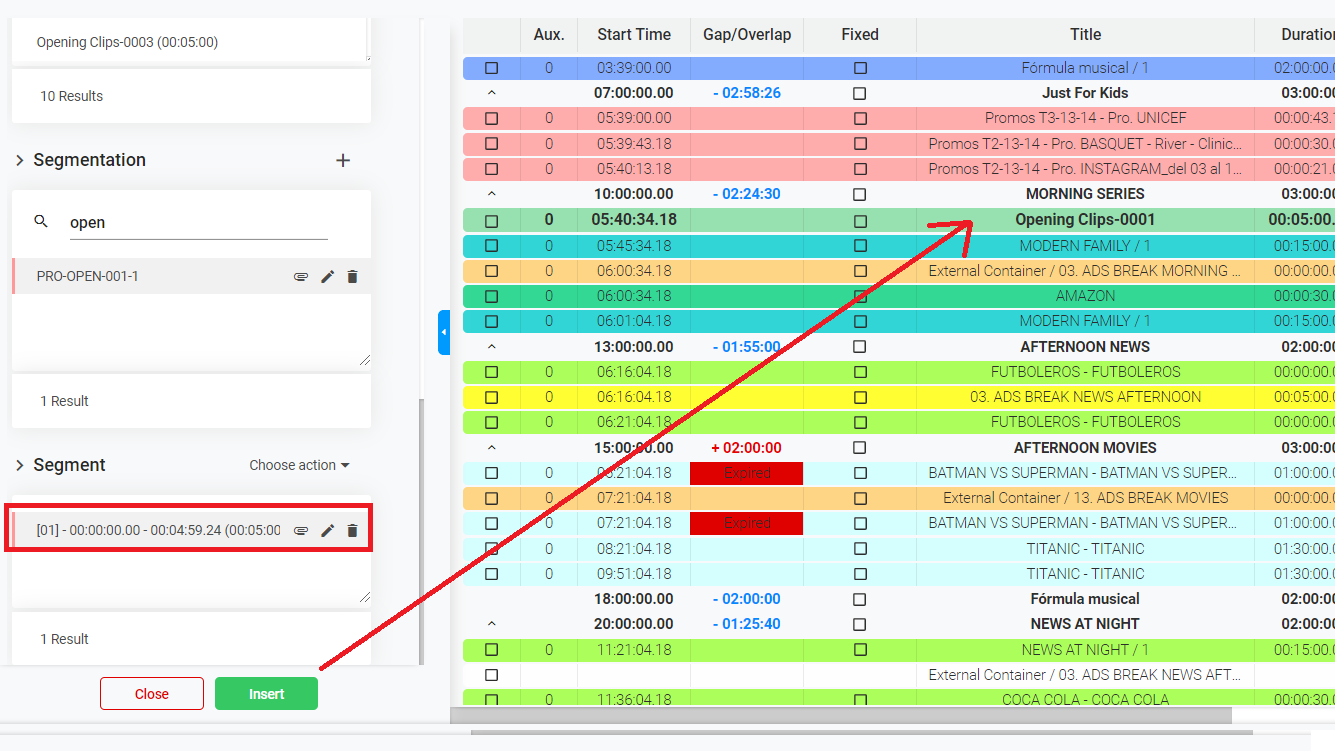
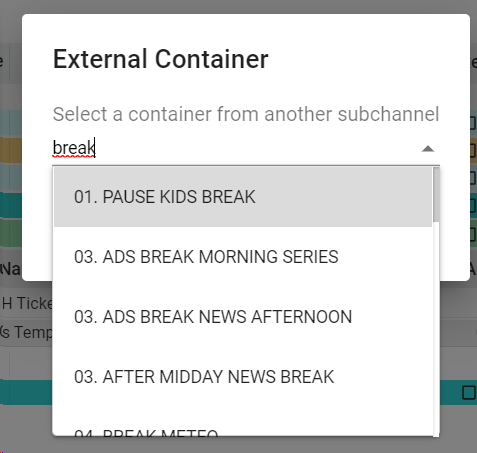
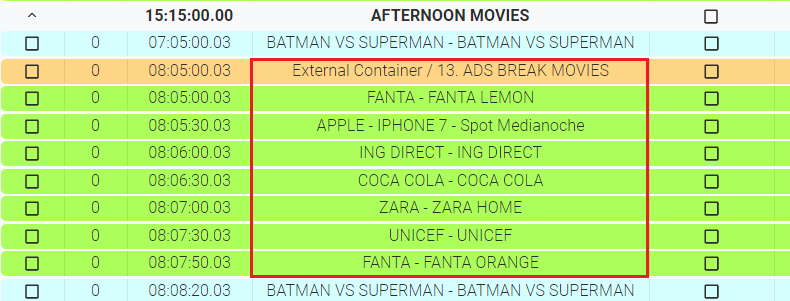
Use this option to insert containers from other subchannels, such as advertisement breaks.
Select one position in the playlist by one click over an event.
Click on . This will open a window dialog to select the external container:
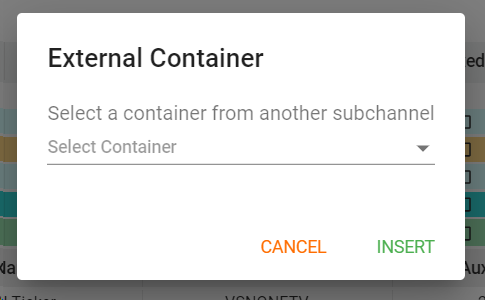
Select the external container you want to add. You can type a text to start filtering:
Click on to insert the external container or to cancel the operation.
Upon clicking "Insert" the external container will be added in the specific position.
The available external containers that you can add into a playlist will be the ones belonging to the container type associated with the current subchannel. For more information, go to Subchannels and check the Container Types configuration parameters.
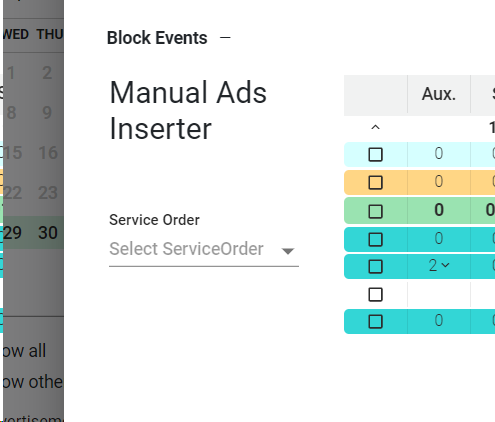
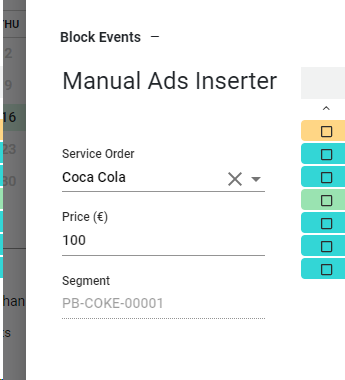
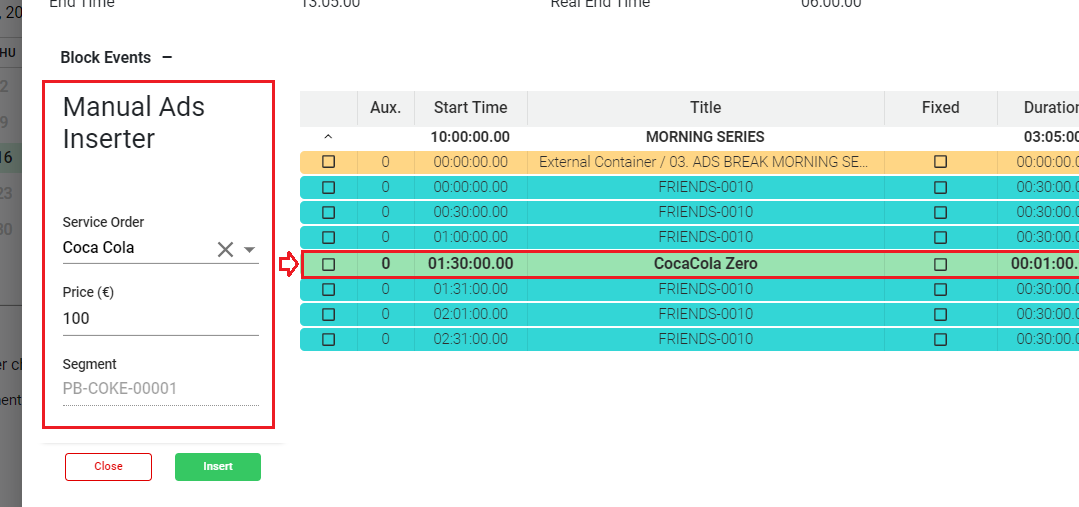
Use this option to manually add advertisements coming from already created commercial service orders. To do so:
Select the position in the playlist where you want to insert the commercial
Click on .
In the left panel, select one of the existing Service Orders.
Once selected, you can manually assign a price, and see the segment related to that specific Service Order
Click on to insert the segment as event in the block.
Click on to close the panel.
The Content Types of the advertisements should be enabled for this specific subchannel. For more information, go to Subchannels and check the Content Types configuration parameters.
For more information about Commercial Contracts and Service Orders, go to Commercials
This option is only available in Secondary subchannels such as for Advertisements (not in main subchannels).
Use this option to insert automatically the scheduled showings coming from the Commercial contracts
Click on .
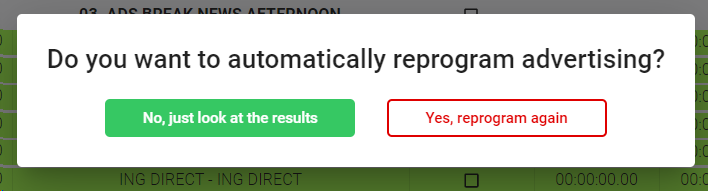
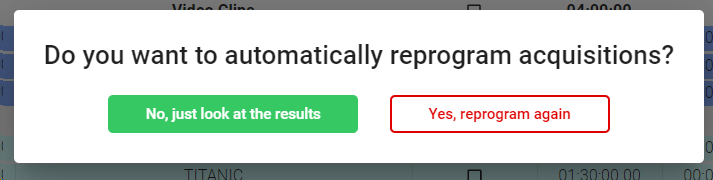
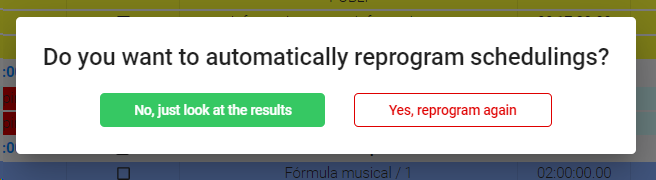
If you already inserted the scheduled showings, this dialog will appear. Select your choice:
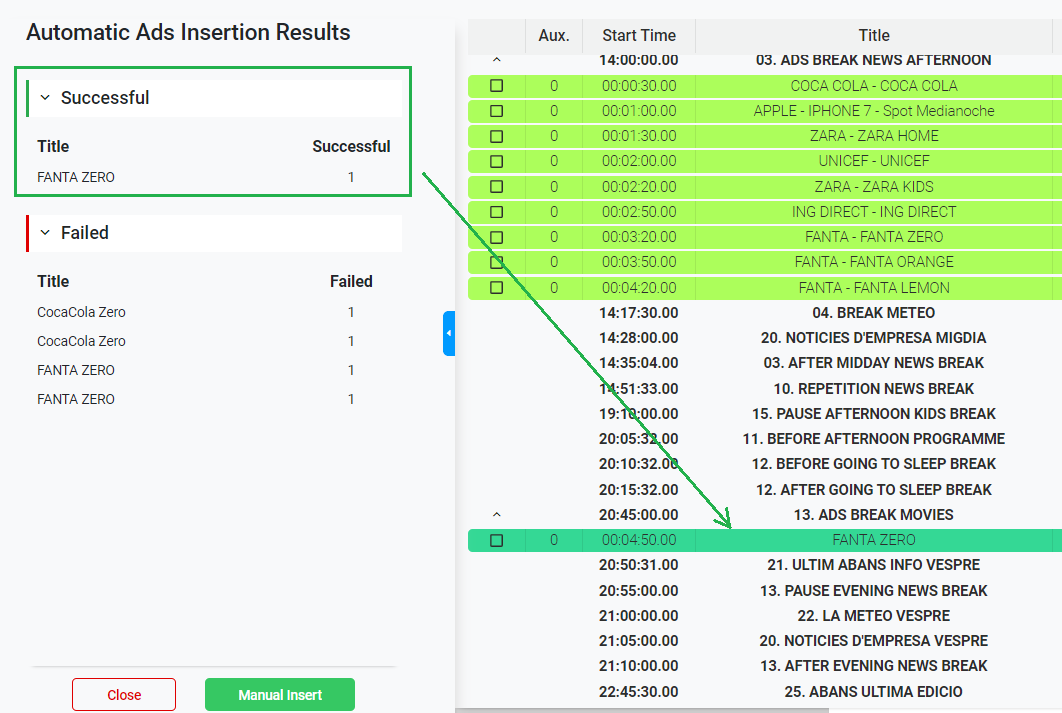
If there are scheduled showings for that specific day, the system will automatically try to insert the events in the corresponding block of the playlist.
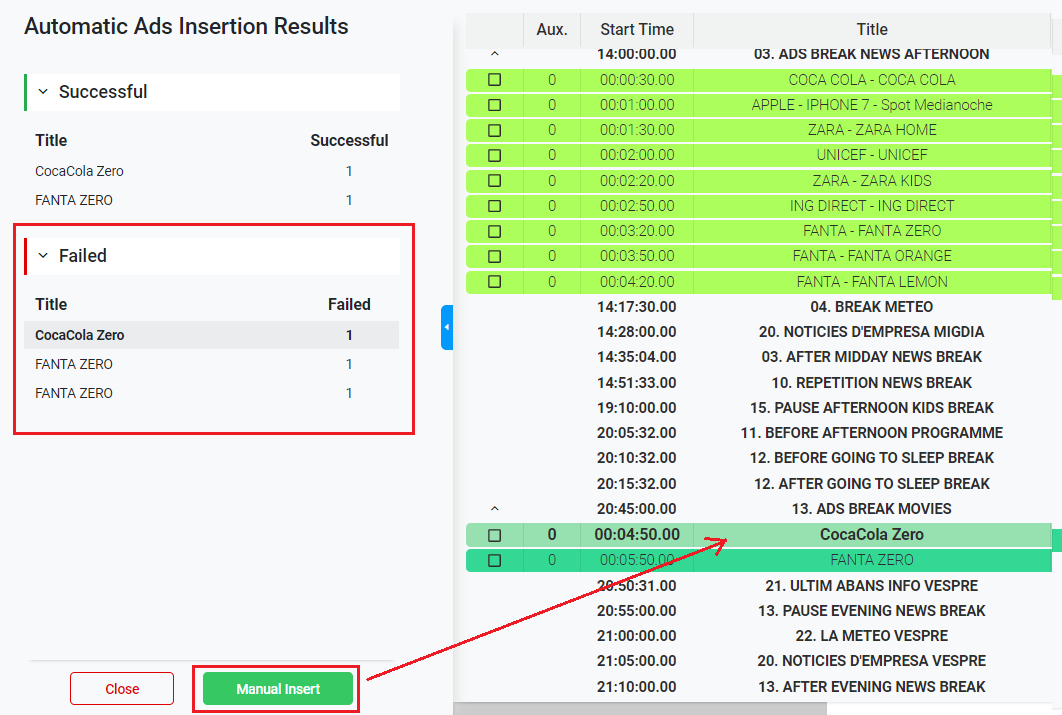
The successful results will appear on the left panel in the "Successful" section, indicating the spot automatically inserted in the corresponding block
If there are some spots that couldn't be inserted automatically in the playlist, they will appear on the left panel in the "Failed" section, indicating the list of failed inserts. This could be due to having repetitions rules to avoid repeating the same product code item. For more information, about commercials repetition rules, go to Manage a Product Code
In that cases it is possible to insert manually the failed showings as events in the playlist. Just select a position in the playlist and the item you want to add and click on
When finished, click on to close the panel.
The Content Types of the productions to be inserted should be enabled for this specific subchannel. For more information, go to Subchannels and check the Content Types configuration parameters.
For more information about Commercial Contracts and Service Orders, go to Commercials
This option is only available in Main subchannels.
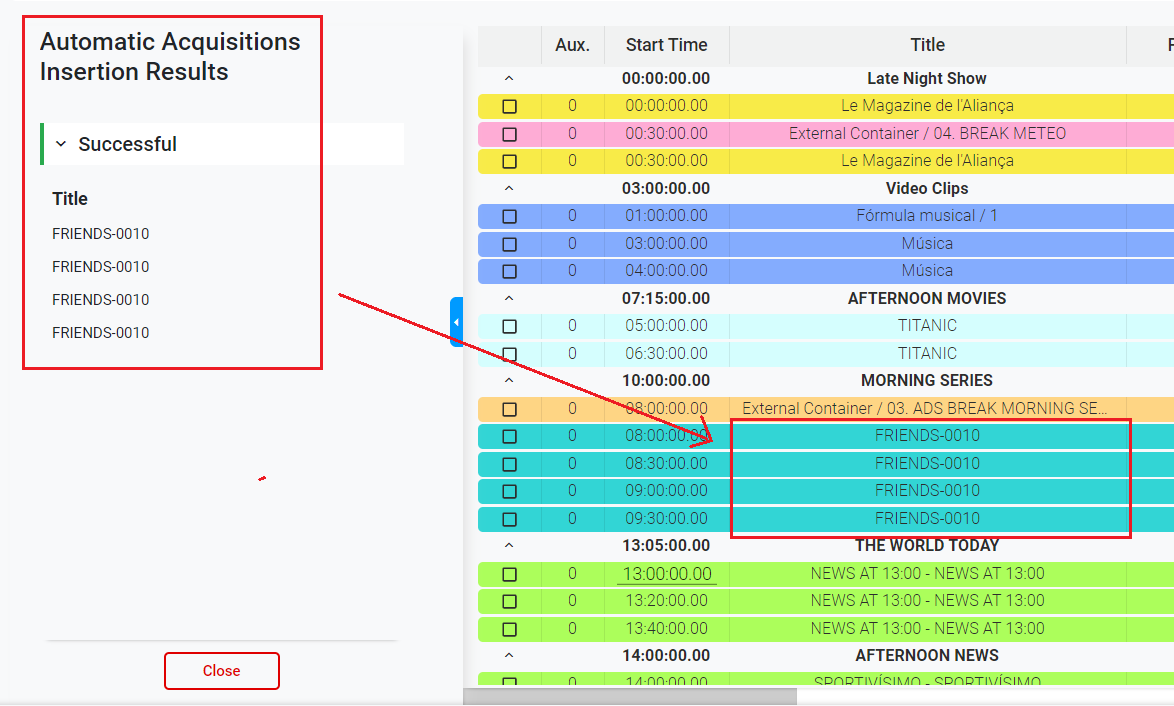
Use this option to insert automatically the scheduled showings coming from the Acquisitions contracts
1. Click on .
2. If you already inserted the scheduled showings, this dialog will appear. Select your choice:
3. If there are scheduled showings for that specific day, the system will automatically insert the events in the corresponding block of the playlist. The successful and/or failed results will appear on the left panel.
4. Click on to close the panel.
The Content Types of the productions to be inserted should be enabled for this specific subchannel. For more information, go to Subchannels and check the Content Types configuration parameters.
For more information about Acquisitions Contracts and Service Orders, go to Acquisitions
This option is only available in Main subchannels.
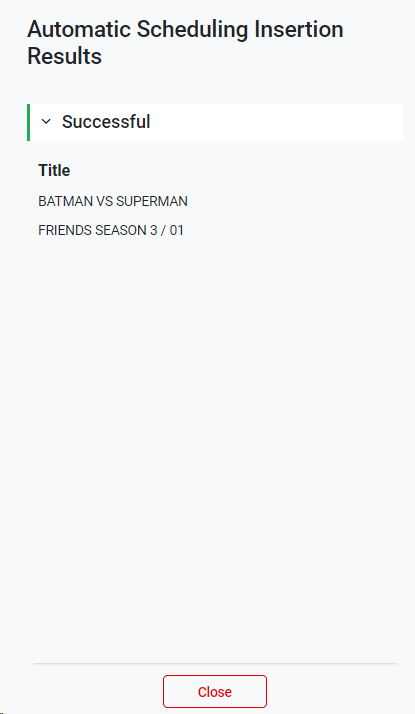
Use this option to insert automatically the scheduled showings coming from the free Scheduling module.
1. Click on .
2. If you already inserted the scheduled showings, this dialog will appear. Select your choice:
3. If there are scheduled showings for that specific day, the system will automatically insert the events in the corresponding block of the playlist. The successful and/or failed results will appear on the left panel.
4. Click on to close the panel.
For more information about how to freely schedule content, go to Scheduling
This option is only available in Main subchannels.
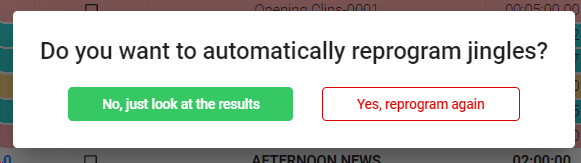
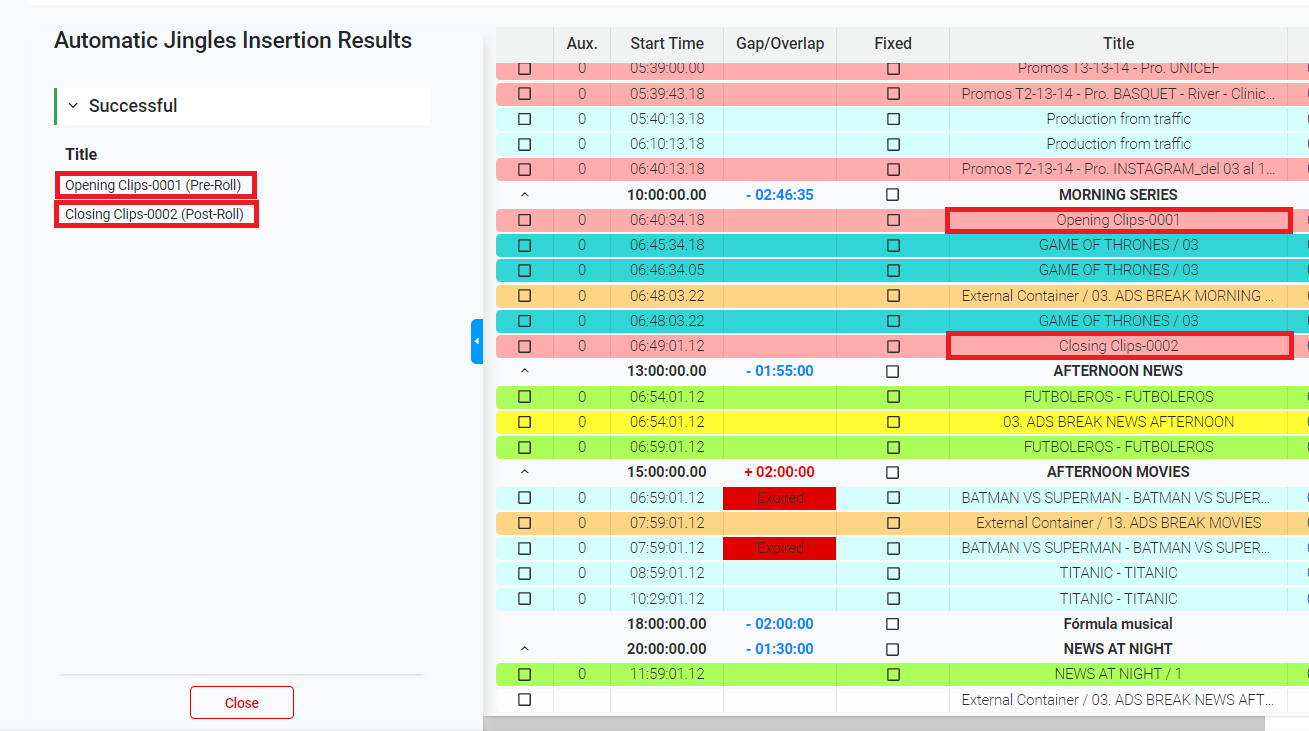
Use this option to import in the playlist the Jingles scheduled for this specific day.
1. Click on
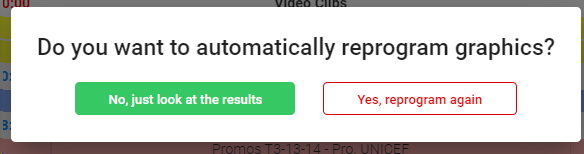
2. If you already inserted Jingles, this dialog will appear. Select your choice:
3. If there are scheduled Jingles in that specific day, the system will automatically insert the events in the corresponding blocks of the playlist. The successful and/or failed results will appear on the left panel.
This option is only available in Main subchannels.
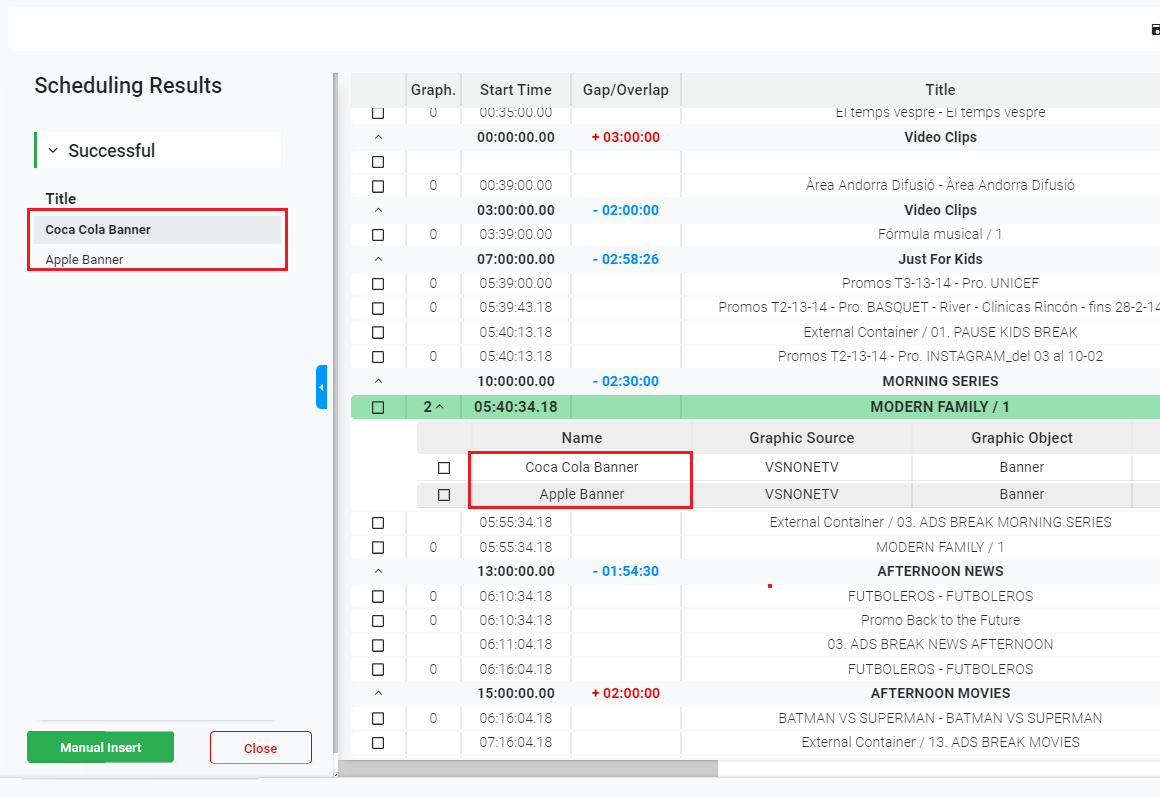
Use this option to import automatically graphic events schedeuled for this specific day.
1. Click on
2. If you already inserted Graphics, this dialog will appear. Select your choice:
3. If there are scheduled Graphics in that specific day, the system will automatically insert the events in the corresponding blocks of the playlist. The successful and/or failed results will appear on the left panel.
4. If there are some graphics that couldn't be inserted automatically in the playlist, they will appear on the left panel in the "Failed" section, indicating the list of failed inserts. In that cases it is possible to insert manually the failed showings as graphics in the playlist. Just select a main event in the playlist and the graphic item you want to add and click on
This option is only available in Main subchannels.
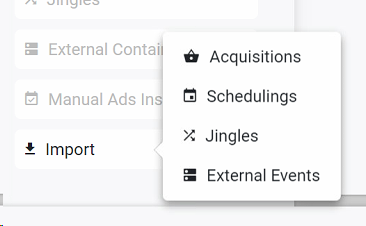
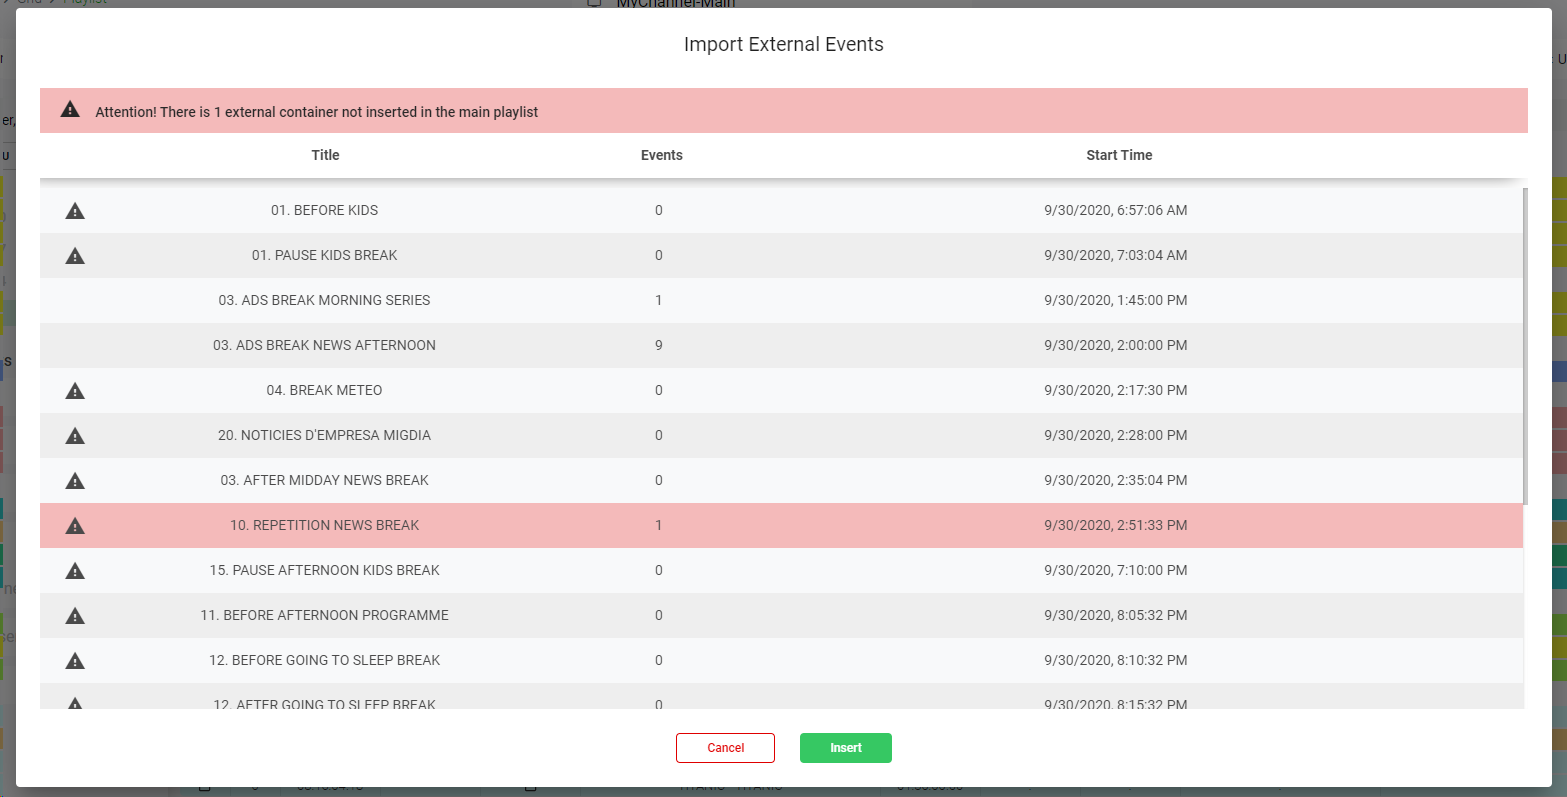
Use this option to import automatically events from other related subchannels, like advertisement breaks. The events of that external containers will be imported into the external containers included in the main playlist.
2. Once you have the external containers in the playlist, click on Import >> External Events .
3. A dialog window will appear indicating the corresponding blocks and events existing in the corresponding secondary subchannel for that specific day, and the possible errors and wargnings:
4. Click "Cancel" to cancel the operation or "Insert" to insert the external events in the main playlist.
5. If the related subchannel has a created playlist in the same day with events in the specific containers, they will be automatically imported and inserted in the specific block:
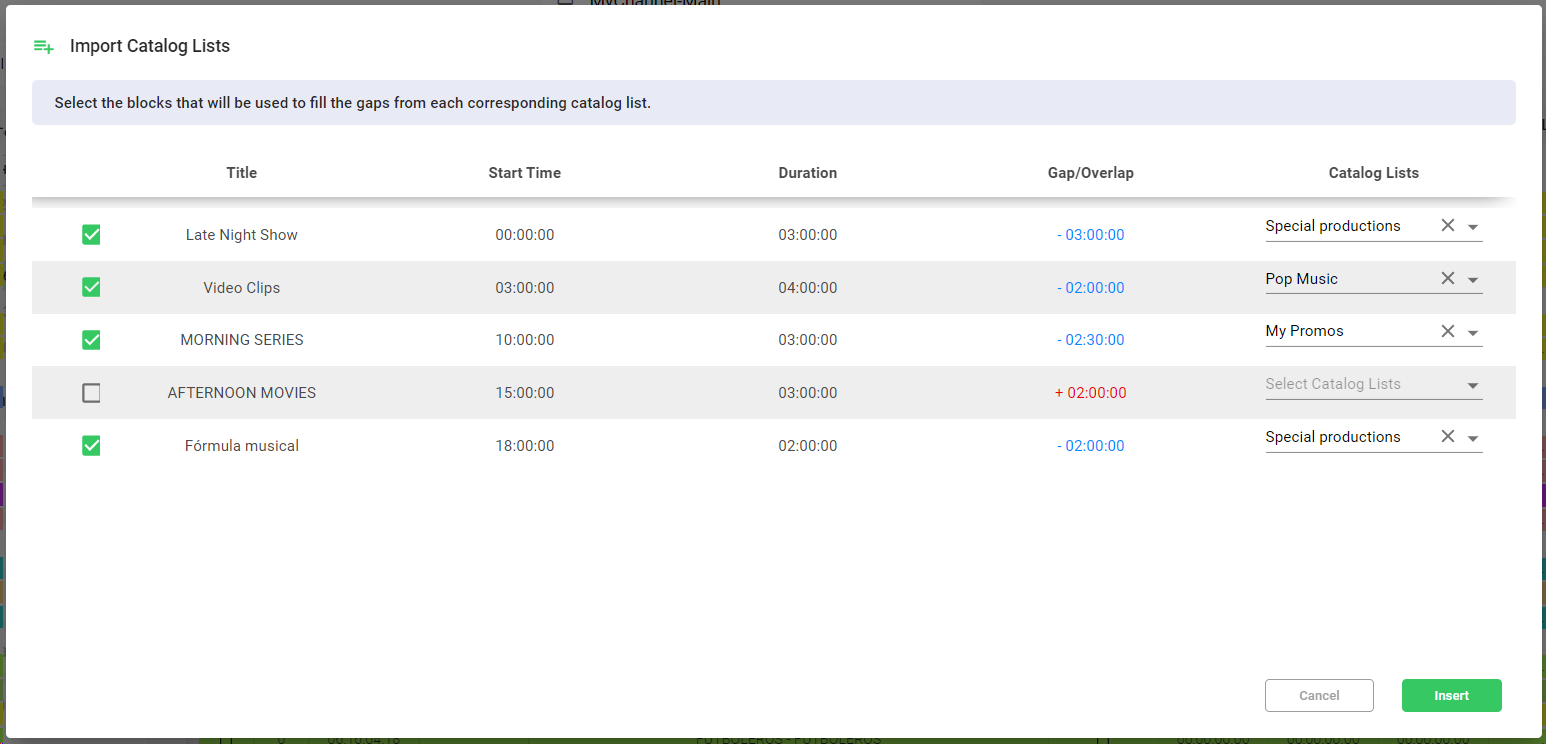
Use this option to automatically fill empty gaps of certain playlist´s blocks from catalog list´s items.
A new window will be opened showing the available blocks (already checked with the option to fill gaps) with its Start Time, Duration, Gap/Overlap, and the catalog list used to fill its gaps.
These are the steps to follow:
1. Select the block/s you want to fill empty gaps.
2. For each block, select the catalog list that will be used to fill the items from.
3. Click "Insert".
At this moment the system will try to fill all the detected gaps in the blocks with the productions from the selected catalog lists.
This action may take several minutes depending on the amount of gaps to fill in the particular playlist.
There are many operations you can do with the events in a playlist. Let's list some of them:
When drag and drop an event to the grid, you will be able to move it and change its order through the playlist by drag and drop.
To copy an event press the "Control" key and drop it in another place of the playlist
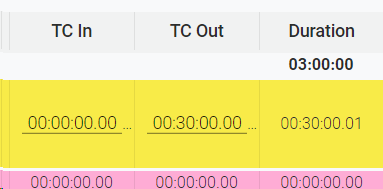
Double click on timming columns to set manually TCIn, TCOut, etc.
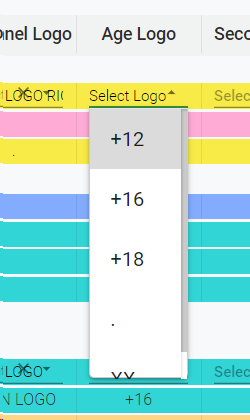
Double click on selector columns and you will be able to set parameters such as logos, secondary actions, etc.
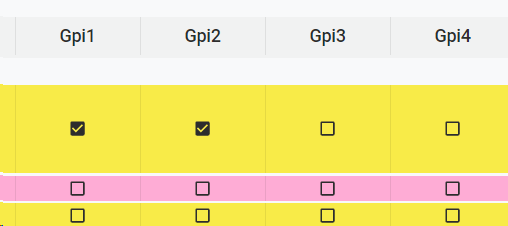
You can click on the check boxes to enable or disable verification parameters
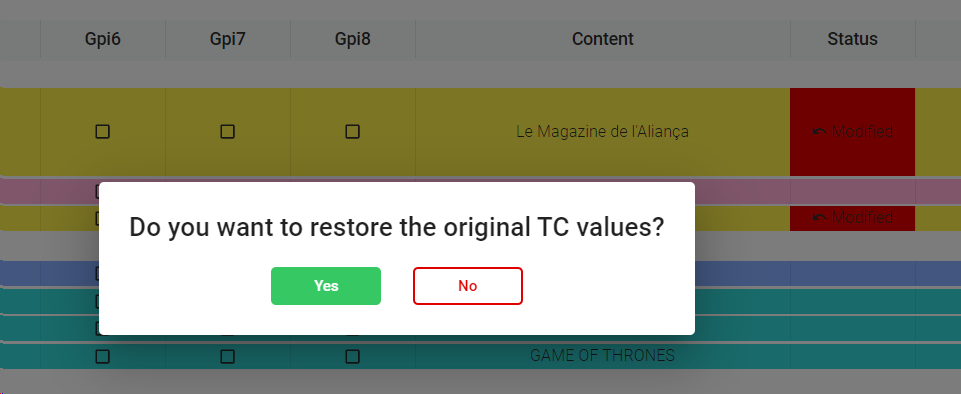
When you are modifying an event (time codes of the segment) that came with inherit parameters from the catalog, the column "Status" will indicate that has been modified respecting to its original parameters. Click to reset the values of the event to its original settings.
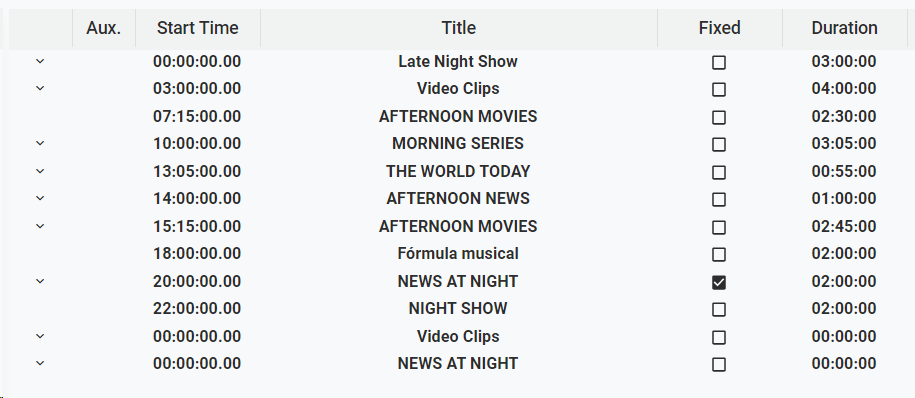
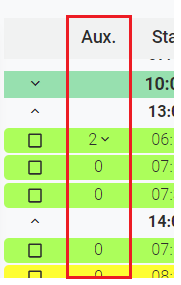
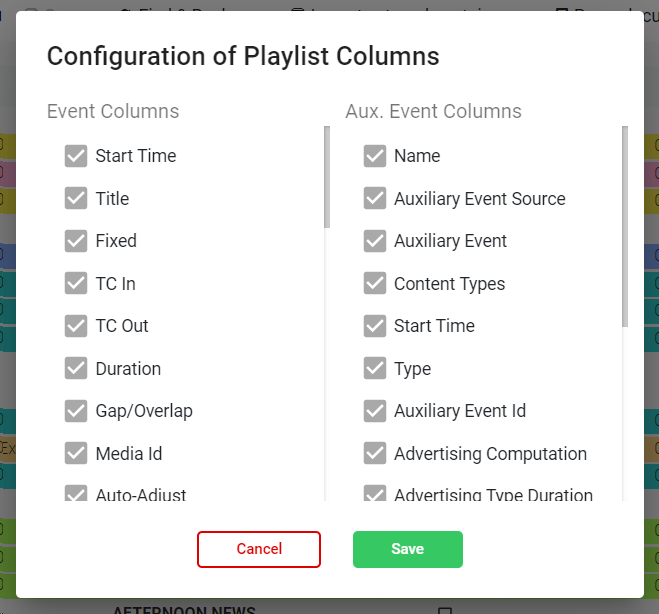
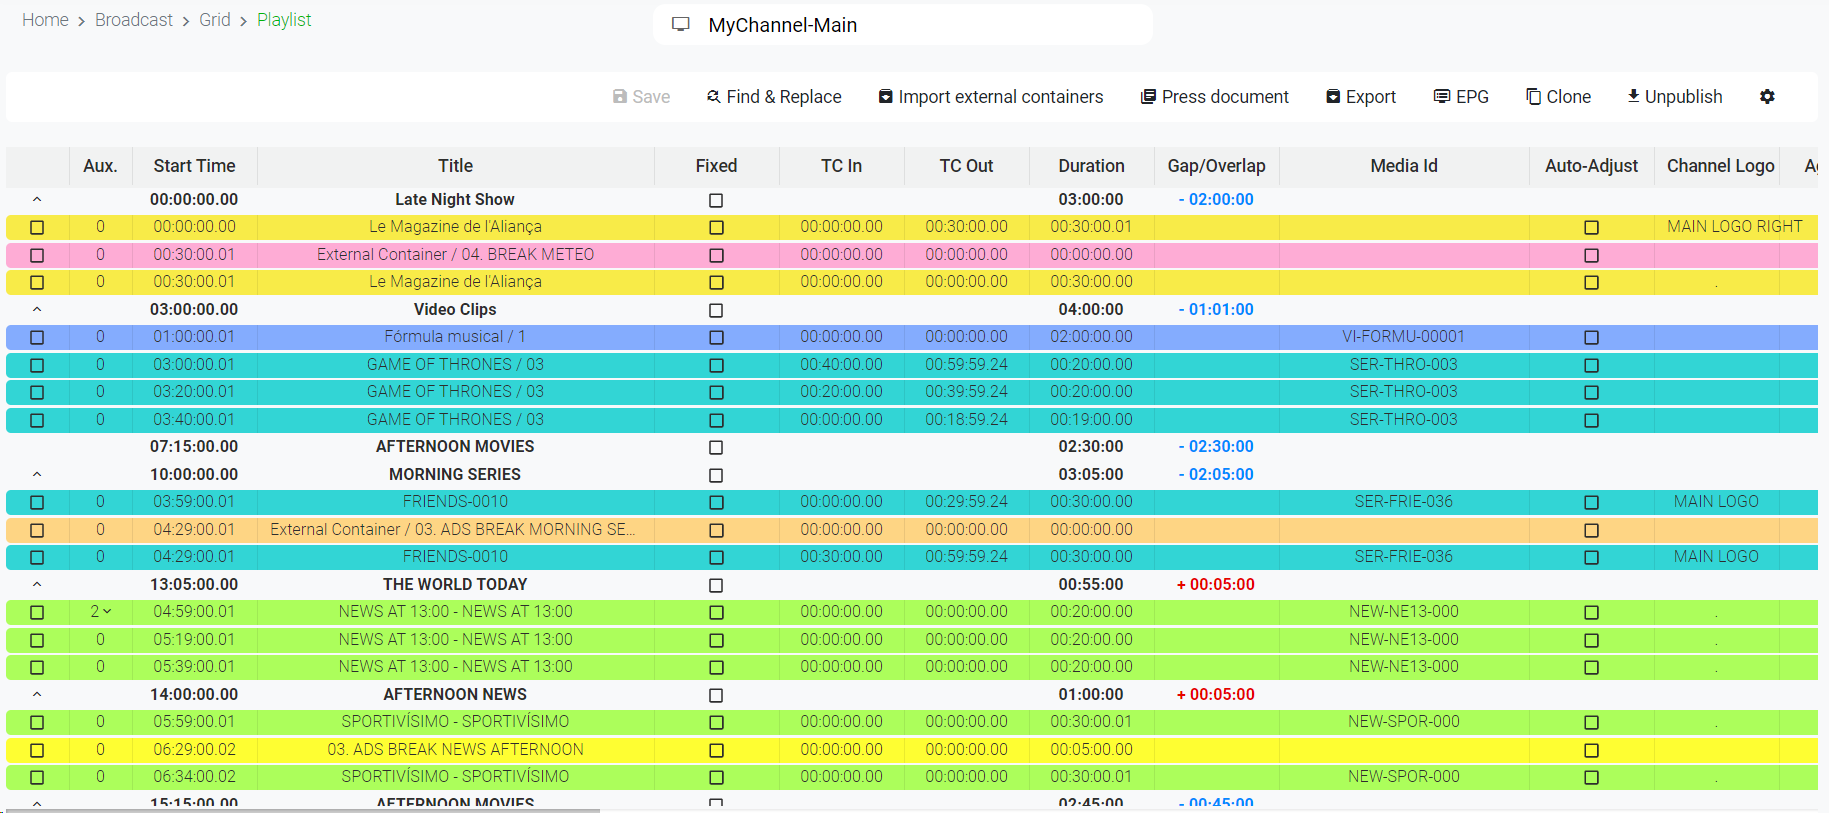
The column "Aux." indicates the number of graphics included in each main event. For more information on how to add graphics into a playlist, go to Graphics Catalog
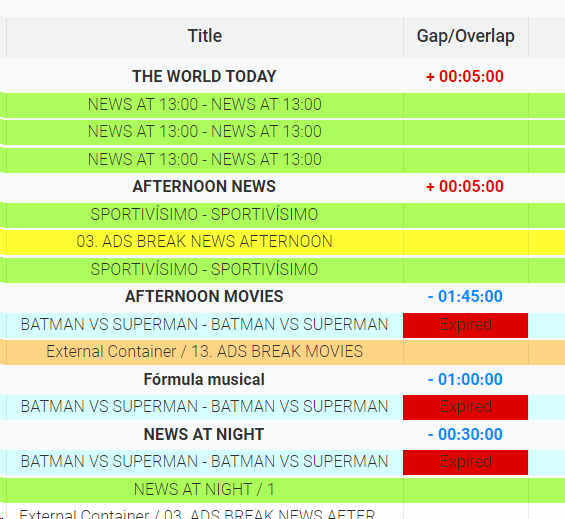
The column "Gap/Overlap" indicates if the total duration of the events inside a block is exceeding (+) or not reaching (-) the duration of the block. This column is also used to indicated the productions of the catalog that are expired for that specific day:
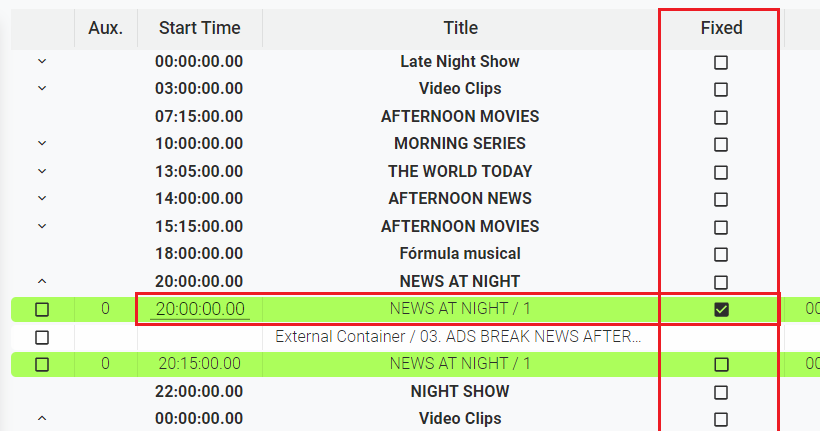
The "Fixed" column let the user force a Start Time for the selected event. When you check the "Fixed" value in one event, the Start Time column will be enabled to introduce manually the time code:
Click on "Save" to save the changes on the playlist.
If the playlist has been already consolidated, you won't be able to do any change. This message will appear on the already consolidated playlists: . For more information, go to Consolidations
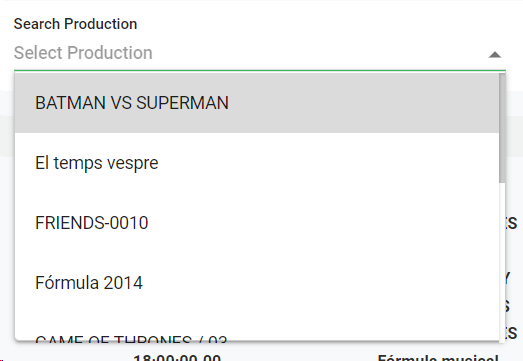
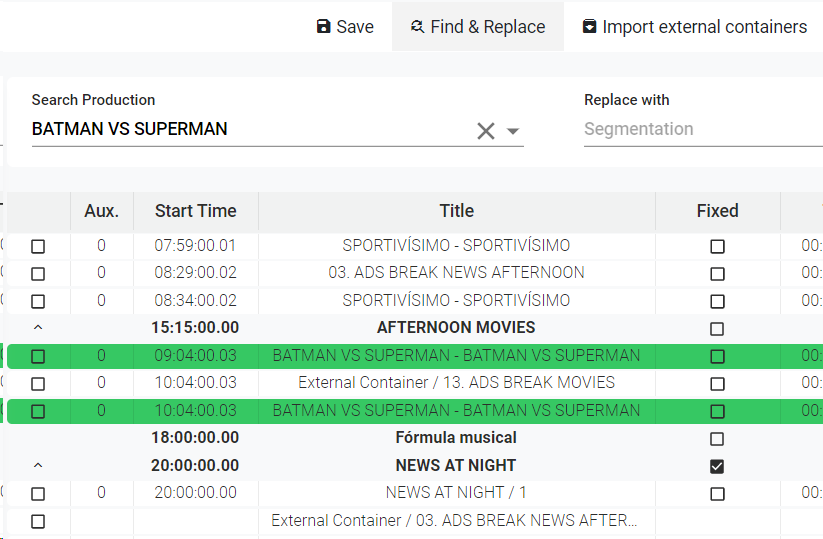
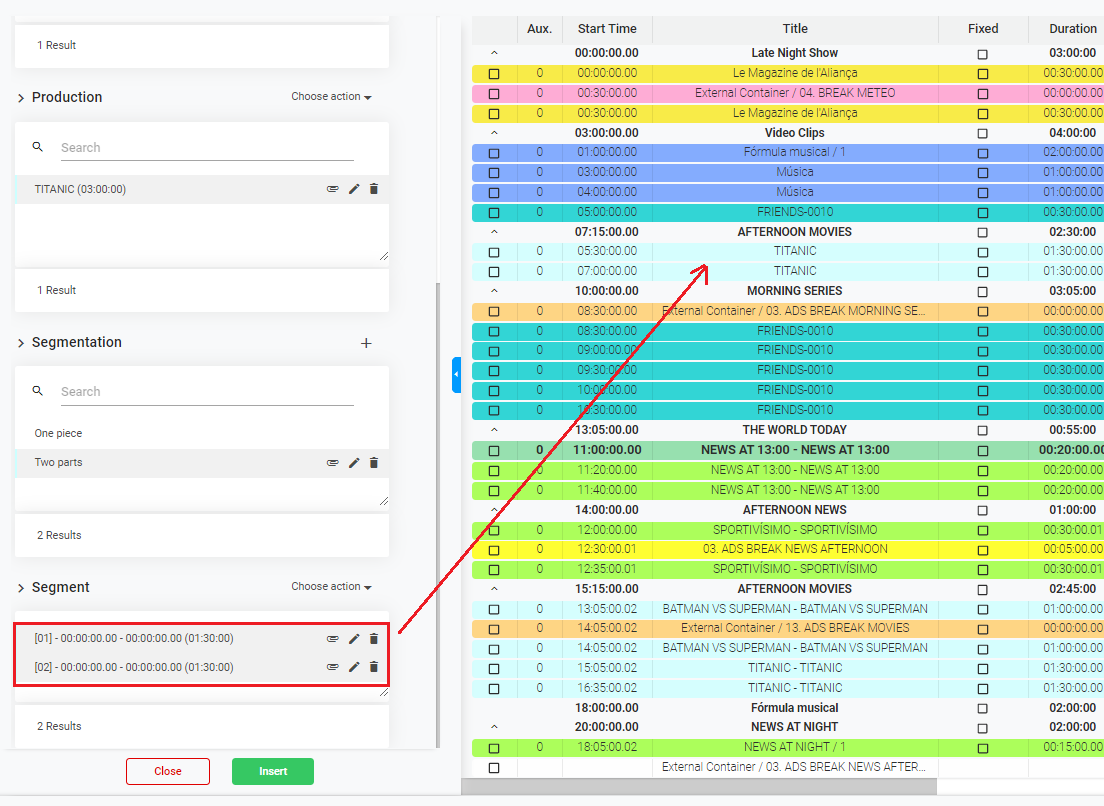
This option is useful to do a massive change of events in the playlist. You can search existing productions in the playlist and replace them by another in the catalog. To do so:
Click on . This will open this panel:
In "Search Production", select the production of the playlist you want to replace. You can use the text search
All the events matching with the search will be highlighted in green
In "Replace with", click on the box and this will open the catalog. Select a segmentation
Click on
To confirm the replacement click on
If the playlist has been already consolidated, you won't be able to do any change. This message will appear on the already consolidated playlists: . For more information, go to Consolidations
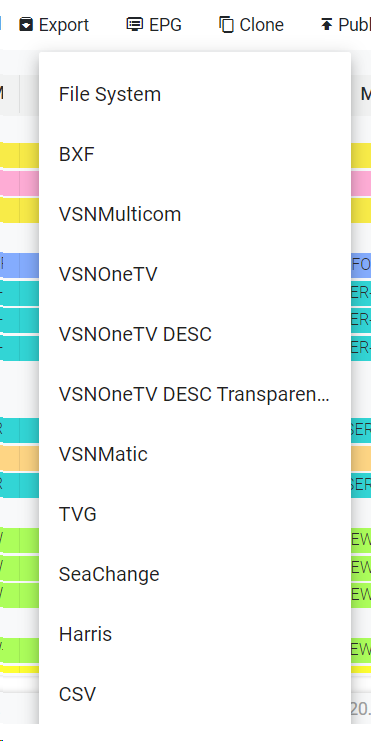
Click on this button to export the playlist in many different formats. You can choose any of the available options.
This will download the specific format type locally. The default format types for export can be configured from the Channel Administration. To know more, go to Channels
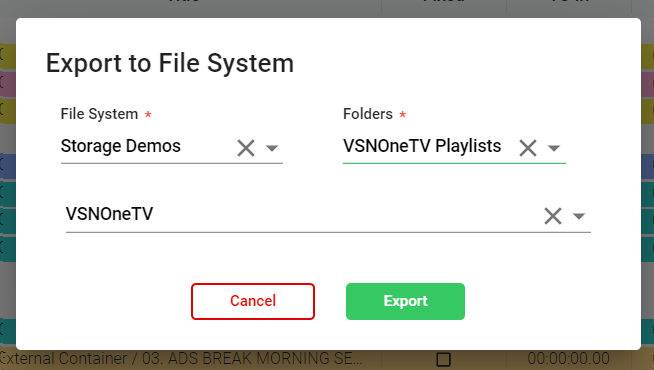
If you want to send the playlist file into a shared folder location
Select the option "File System".
Introduce the File System, the Folder and the playlist format.
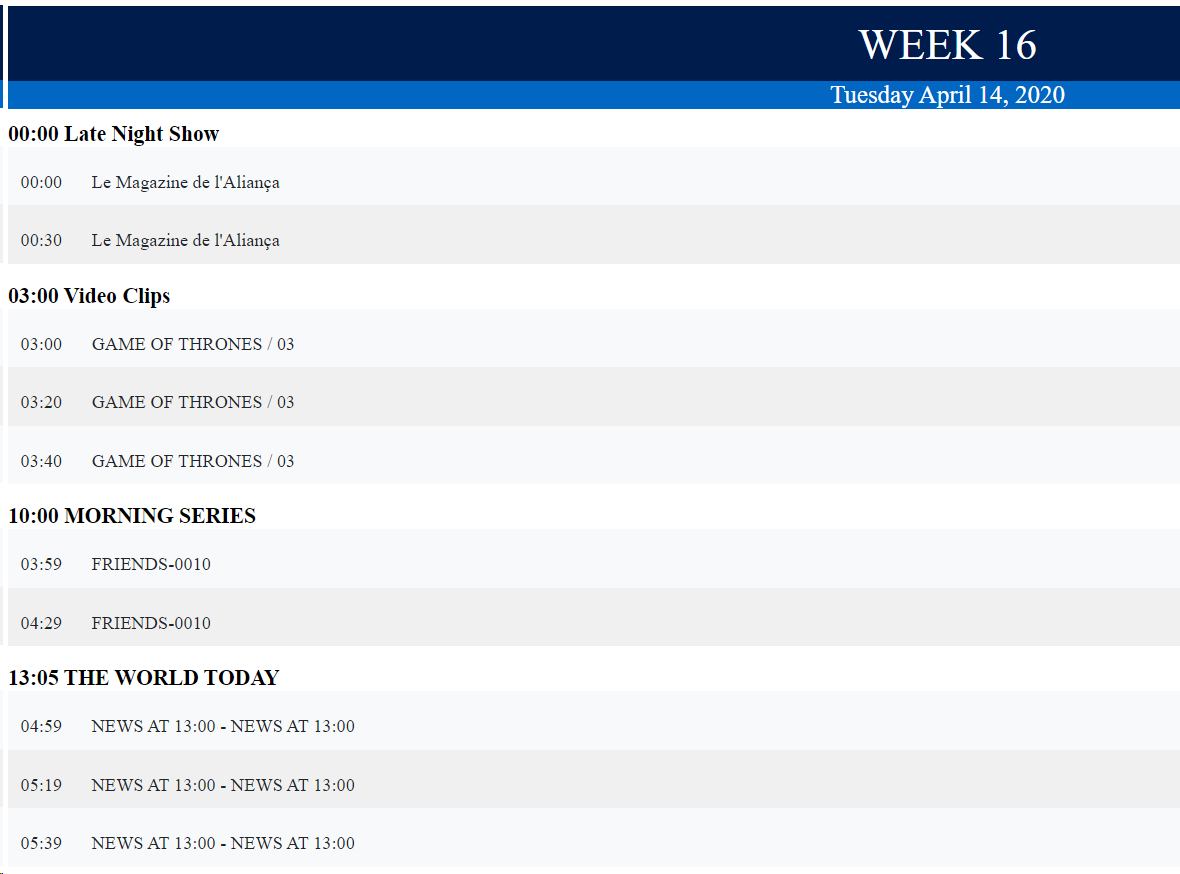
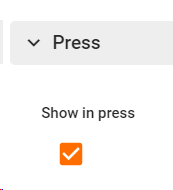
If you want to generate an HTML for the Press, choose the "Press Document" option. This option will generate an HTML document with the playlist blocks and events.
It will only include the events belonging to specific Content Types. In the Content Type configuration you can set which content should be included or not in this document, activating or deactivating the parameter "Show in press" in the Content type form:
You can also use custom export types for the playlists, that will appear in the available list. To create custom formats, go to Administration >> Custom Exports
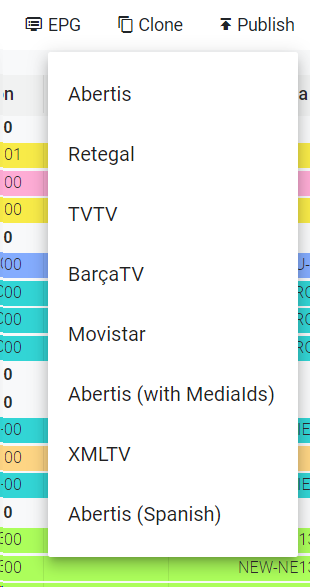
Click on this button to export the EPG (Electronic Program Guide) of the current playlist among the available options:
You can also use custom export types for the EPGs, that will appear in the available list. To create custom formats, go to Administration >> Custom Exports
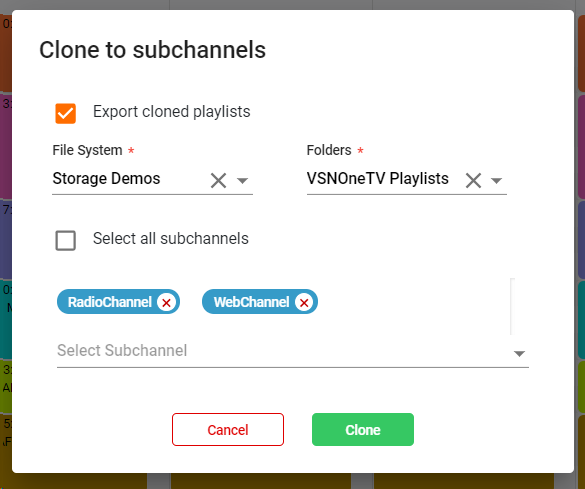
If the box is not checked, you must specify the subchannel/s from the selection list.
If the box is checked, the action will clone the playlist to all the subchannels of the organization.
Upon clicking the system will clone the grid to the selected subchannel/s and if the subchannel already have a grid in the same week it will create a new one, marking the current playlist as "Published"


 to add the graphic or
  to cancel the operation