×
Menu
Index
  • Consolidations

Consolidations


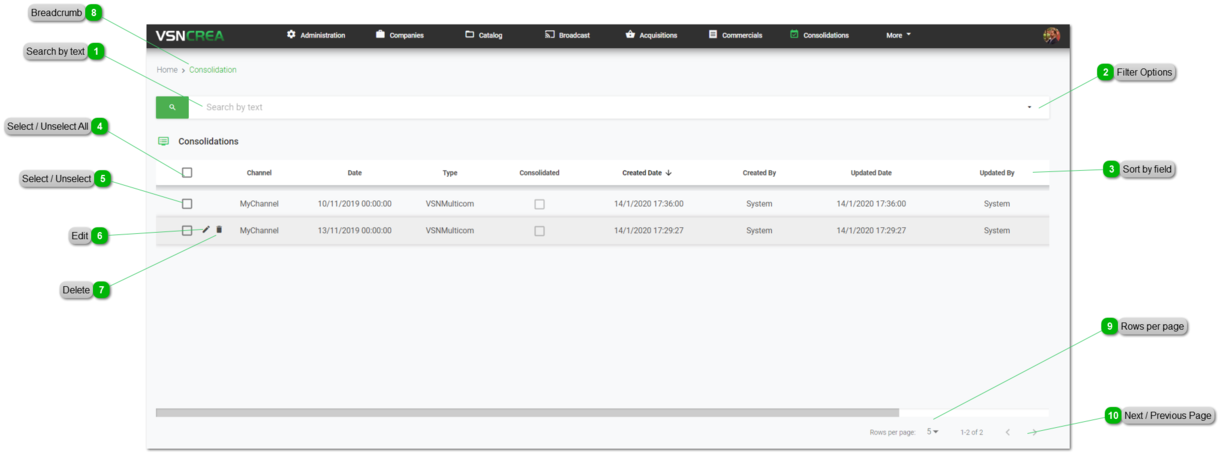
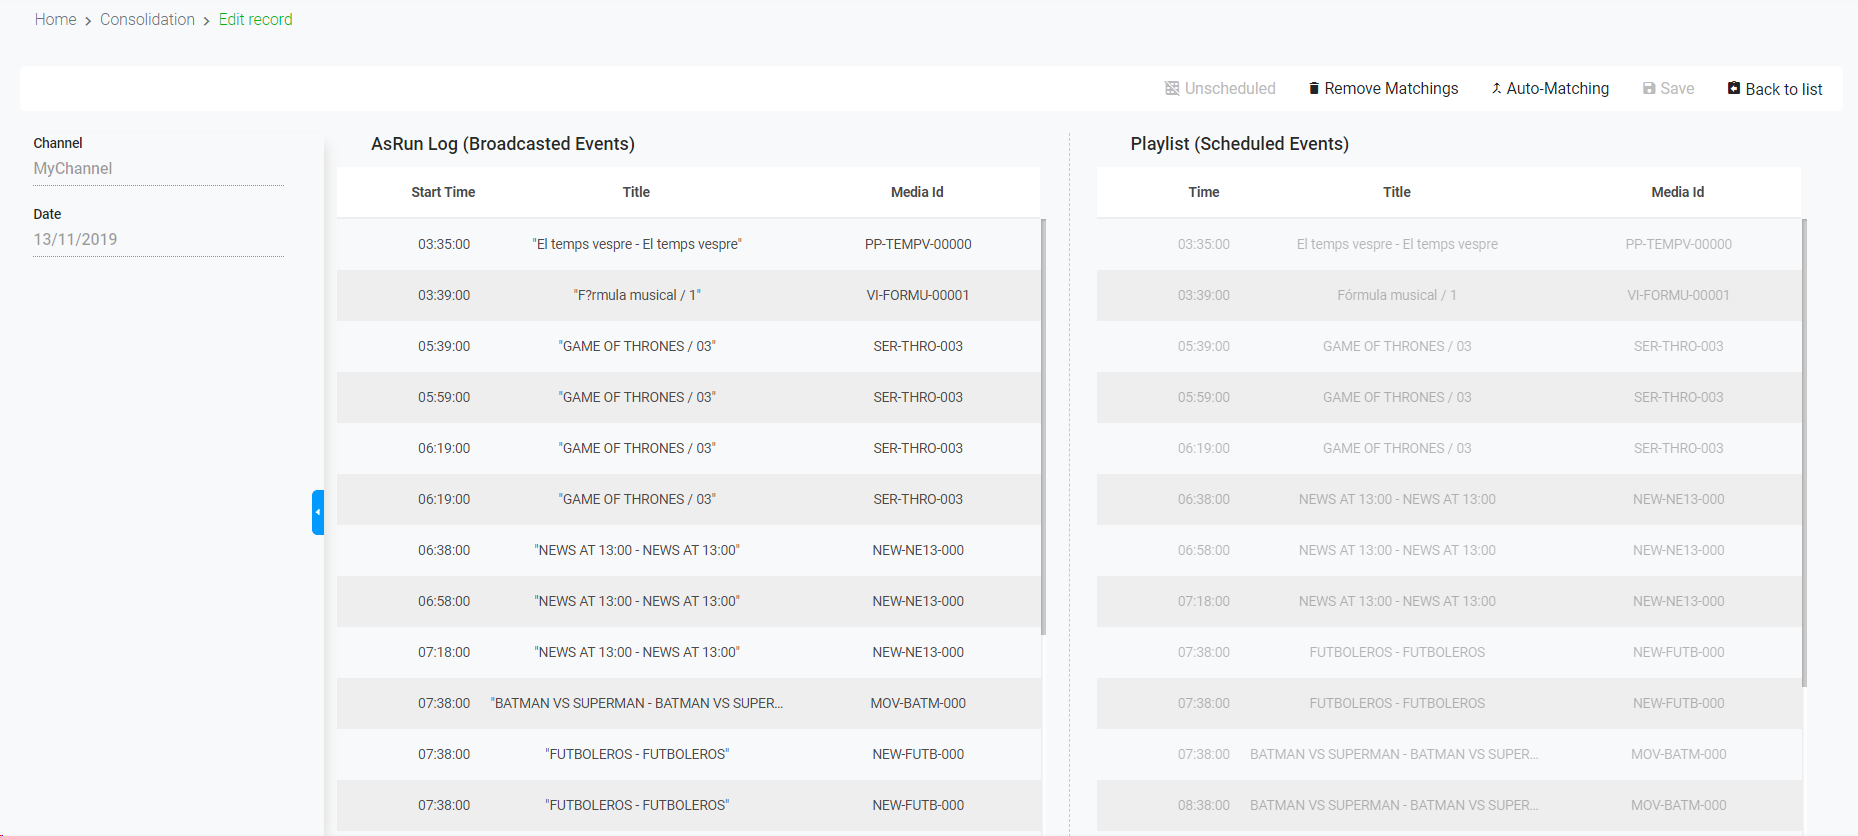
The Consolidations module is designed to carry out the tasks right after the broadcast. From this interface users will be able to validate the broadcasted events from the AsRunLog generated by the corresponding automation system for each channel, to detect possible inconsistencies between the scheduled events in VSNCrea and the real broadcasted ones in the automation system, and consolidate them.
 
To access to the Consolidations, just click on   in the top main menu.
 
We will find automatically the list of every day's broadcasted playlists, and we'll be able to access and verify each one.
 
The Consolidations will only appear if the automation system is generating correctly the AsRunLog files and if the Historic Inserter plugin is properly configured. For more information, go to Plugins >> Historic Inserter
 
 
Consolidations
 
1

Search by text

1. Search by text
Start typing a text and click Enter. The system will show you the results matching with your query
 
2

Filter Options

2. Filter Options
 
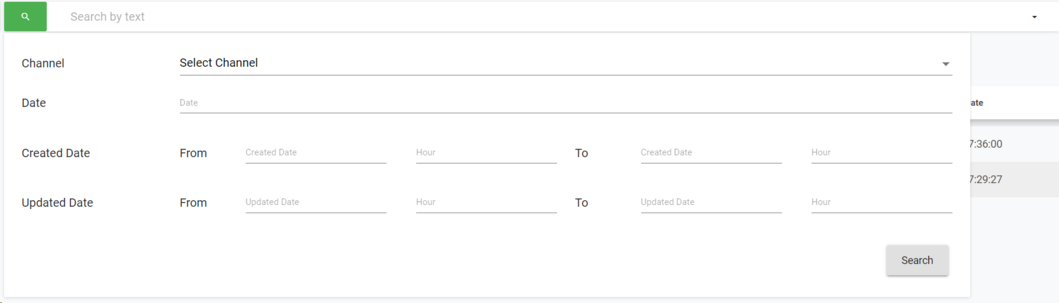
Click the drop down menu to display the filtering options. You can filter subchannels by channel and date . Select your filters and click on the "Search" button.


Click to clear the value and remove the filter.
 
 
For more information about Channels, go to Channels
 
3

Sort by field

3. Sort by field
 
You can click on any of the available fields in the columns, to order the results, ascending  or descending
 
Each user can also change the position of each column just using drag & drop.
 
4

Select / Unselect All

4. Select / Unselect All
 
Click on this checkbox to select or unselect all the elements of the list. When selected, the trash icon to delete all  will be enabled.
5

Select / Unselect

5. Select / Unselect
 
To select or unselect individual elements, click each checkbox. When some element is selected, the trash icon to delete them will be enabled.
6

Edit

6. Edit
 
To edit an existing consolidation:
 
  • Mouse over on the element and click the   icon;


  • or just one click on the selected row.
 
This will open the consolidation form for that specific day


For more information, go to How to manage consolidations
 
7

Delete

7. Delete
 
To delete a consolidation:
 
  • Mouse over the element, and click on the icon
 
  • Select or multi-select them using the checkboxes and click on the top trash icon


This action will show the following dialog:


Click to delete the selected users, or to cancel the operation.


If the element you want to delete has dependences , it won't be deleted and the system will show you a list of existing dependences
 
 
8

Breadcrumb

8. Breadcrumb
 
It shows the current page's location within a hierarchy of content to browse history and to provide the navigation tool.
 
9

Rows per page

9. Rows per page
Click on the drop down item to select the numbers of rows per page between the available options:
 
 
10

Next / Previous Page

10. Next / Previous Page
Click to go to the previous page or to go to the next page
The online help was made with Dr.Explain