To properly display this page you need a browser with JavaScript support.
When you open a template, you will be able to modify it and work with the following operations.
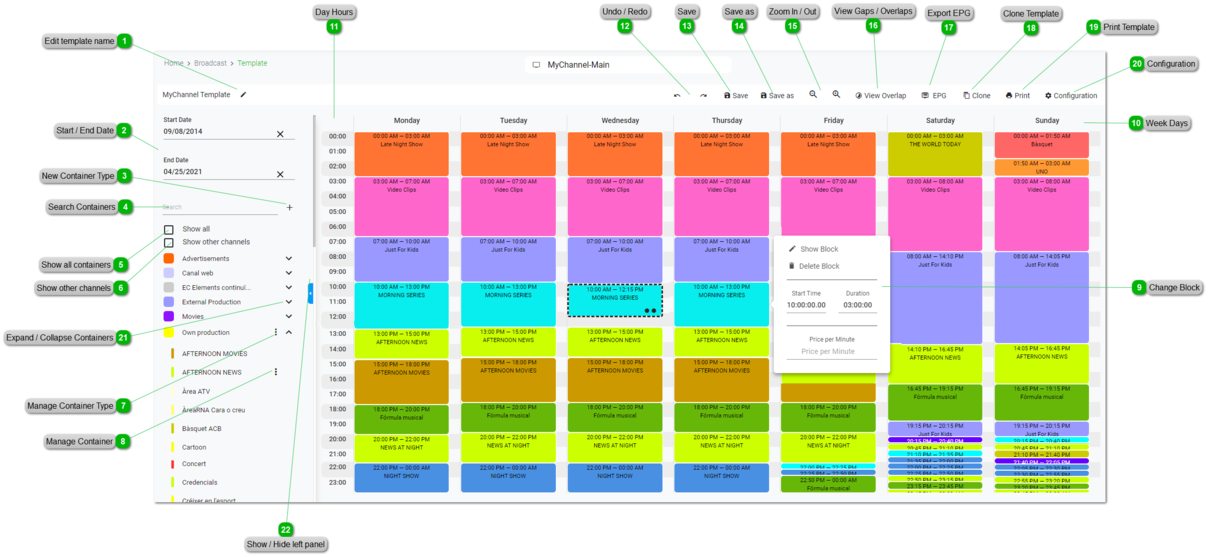
Edit template name Click on
to edit the name of the template. When finished, press "Enter" or click the "Save" button.
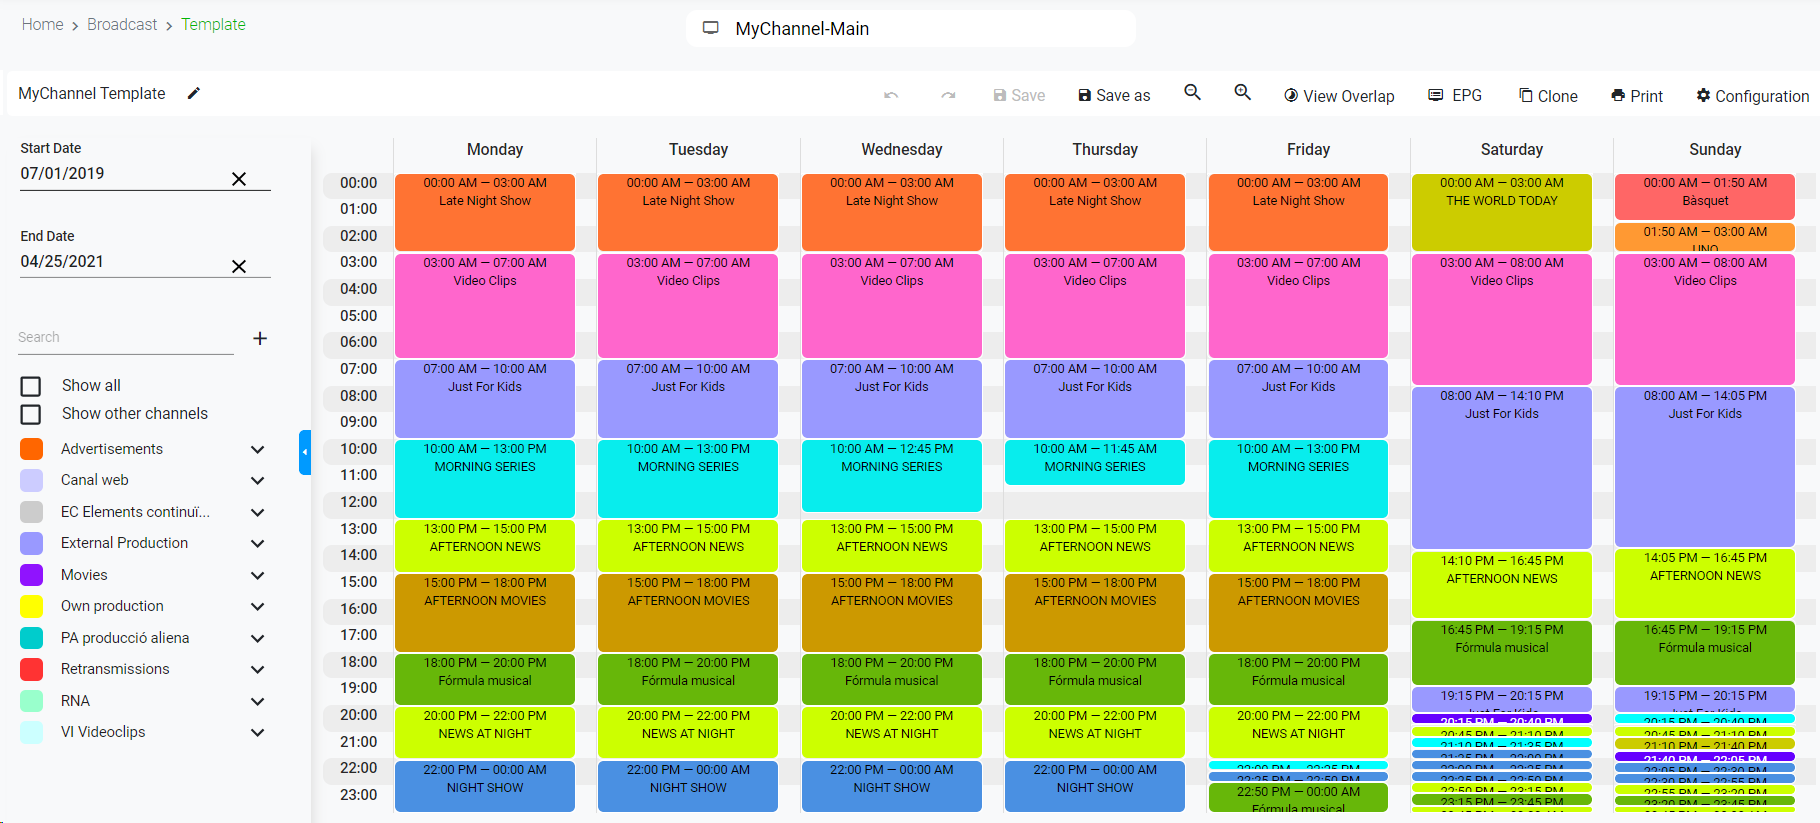
Start / End Date
Pick a
Start Date from the calendar. This date should be the
first day of the week
, that will depend on the format settings of the channel. For more information go to
Channels
Pick an
End Date from the calendar. This date should be the
last day of the week, that will depend on the format settings of the channel. For more information go to
Channels
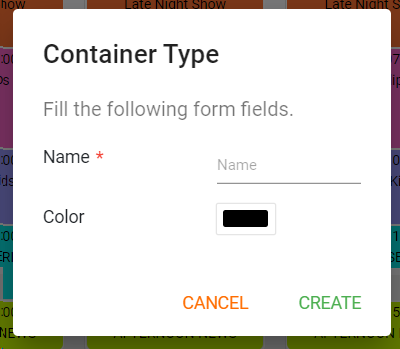
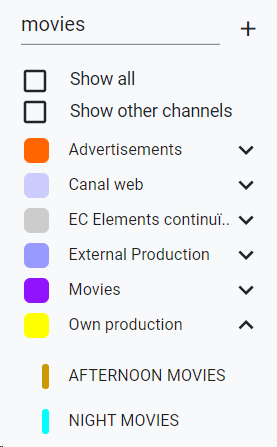
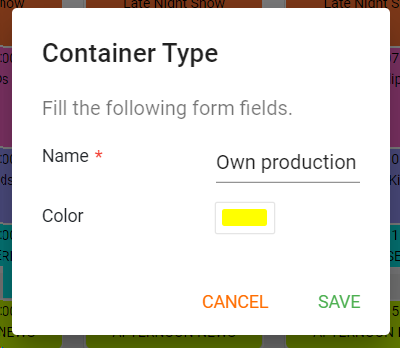
New Container Type The Container Types are used to organize your containers.
1. Click on
button to create a new Container Type.
2. Fill the information:
Name : Name of the container type ("Programmes", "Advertisements", etc.)
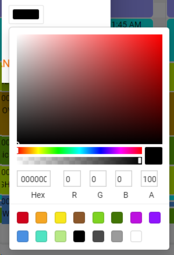
Color . You can set a color to identify the Container Type
3. Click on "Cancel " to cancel the operation or "Create " to create a new Container Type.
4. Once the Container Type is created, you will be able to add Containers.
Search Containers
Start typing a text and click Enter. The system will show you the containers matching with your query.
Show all containers
Check this box to show all the containers, even if they are out of the dates of the template.
Show other channels
It is possible to use containers of container types that are associated to other subchannels. Check this box to show the containers associated to other subchannels
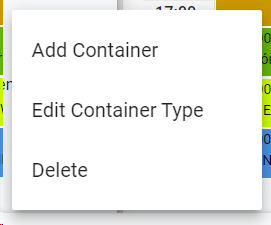
Manage Container Type When we hover over a Container Type, this icon will appear
. Click on this to show the available options:
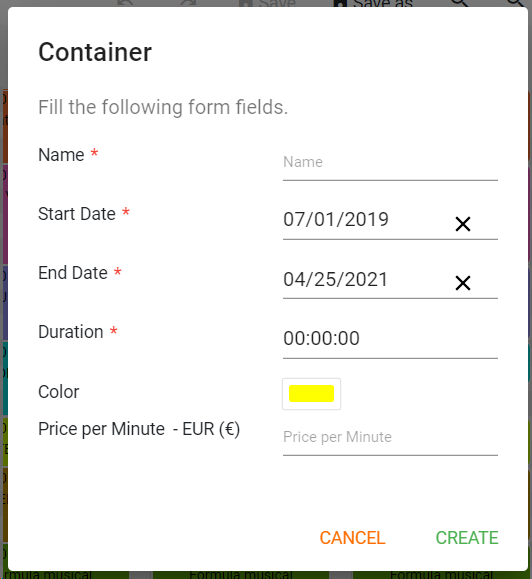
Add Container. Click to add a new container into the selected Container Type.
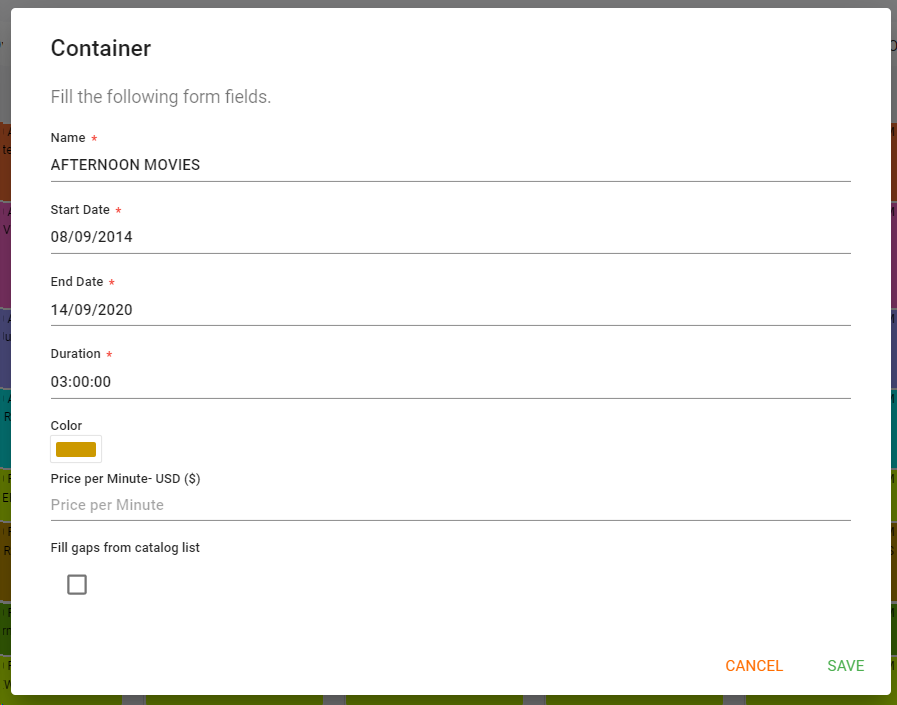
Name . Name of the container that will be shown in the grid
Start Date . When the container will start to be available. By default, this will be inherit from the Start Date of the template
End Date. When the container will expire. By default, this will be inherit from the End Date of the template
Duration : Specify a default duration of the container that will be inherit when adding the block into the grid.
Color . Pick a color that will be shown in the grid.
Click on
to add a new container. Upon clicking "Create" the new container will be ready for its use.
Click on
to cancel the operation.
Edit Container Type . Click to edit the Container Type information
Click on
to save the changes.
Click on
to cancel the operation.
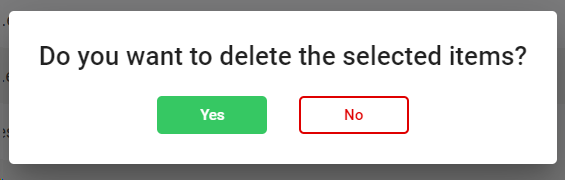
Delete Container Type . This action will show the following dialog:
Click on
to delete the selected users, or
to cancel the operation.
Manage Container
When we hover over a Container , this icon will appear
. Click on this to show the available options:
Edit Container. Click to edit the selected container
Name . Name of the container that will be shown in the grid
Start Date . When the container will start to be available
End Date. When the container will expire
Duration : Specify a default duration of the container that will be inherit when adding the block into the grid.
Color . Pick a color that will be shown in the grid.
Click on
to save the changes on the container.
Click on
to cancel the operation.
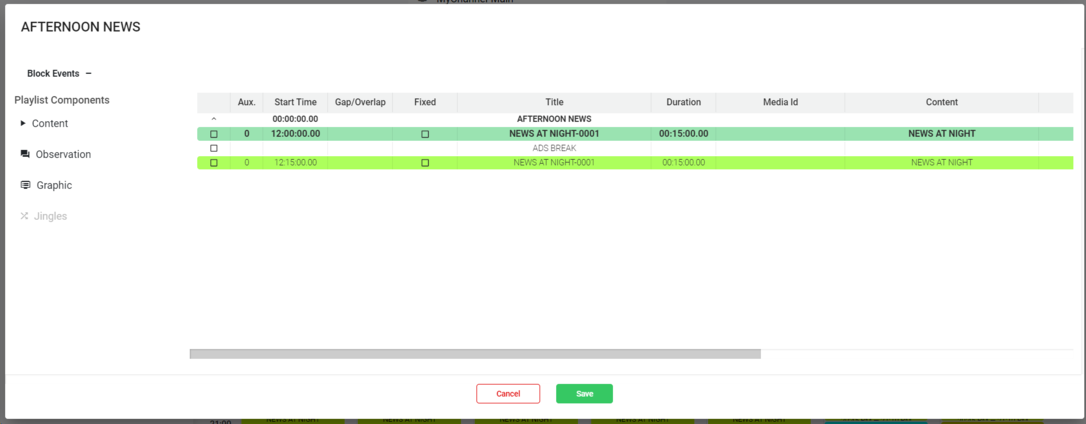
Modify Events . Click to add or modify events inside the container. This will open the container to manage its events.
You can add events such as content from the Catalog, Observations, Graphics, Jingles, etc.
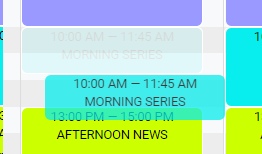
When drag and drop a container to the grid, the block will inherit the container information, and also the contained events.
Click on
to save the changes.
Click on
to cancel the operation.
Delete Container . This action will show the following dialog:
Click on
to delete the selected users, or
to cancel the operation.
Change Block
When drag and drop a container to the grid, you will be able to change the associated block:
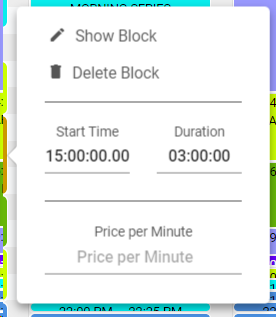
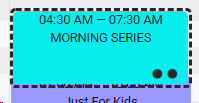
Click on a block to show the following options:
It opens the block where you can add the different available playlists components.
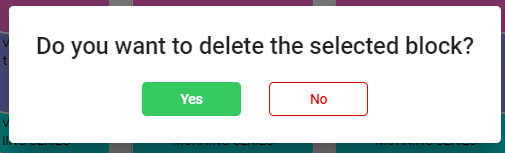
It will show the following dialog.
Click
to detele the block, or
to cancel the operation.
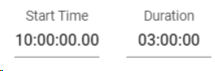
Specify a
Start Time and
Duration of the block
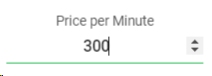
Optionally, specify a Price per Minute.
You can also change the position or the size of a block by adjusting them using drag and drop.
3. You can copy a block from one day to another pressing the Control key and use the drag and drop.
All the last changes done on a block will be indicated with this label:
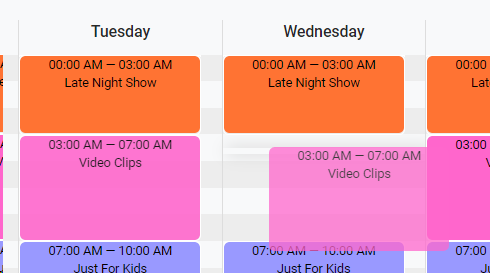
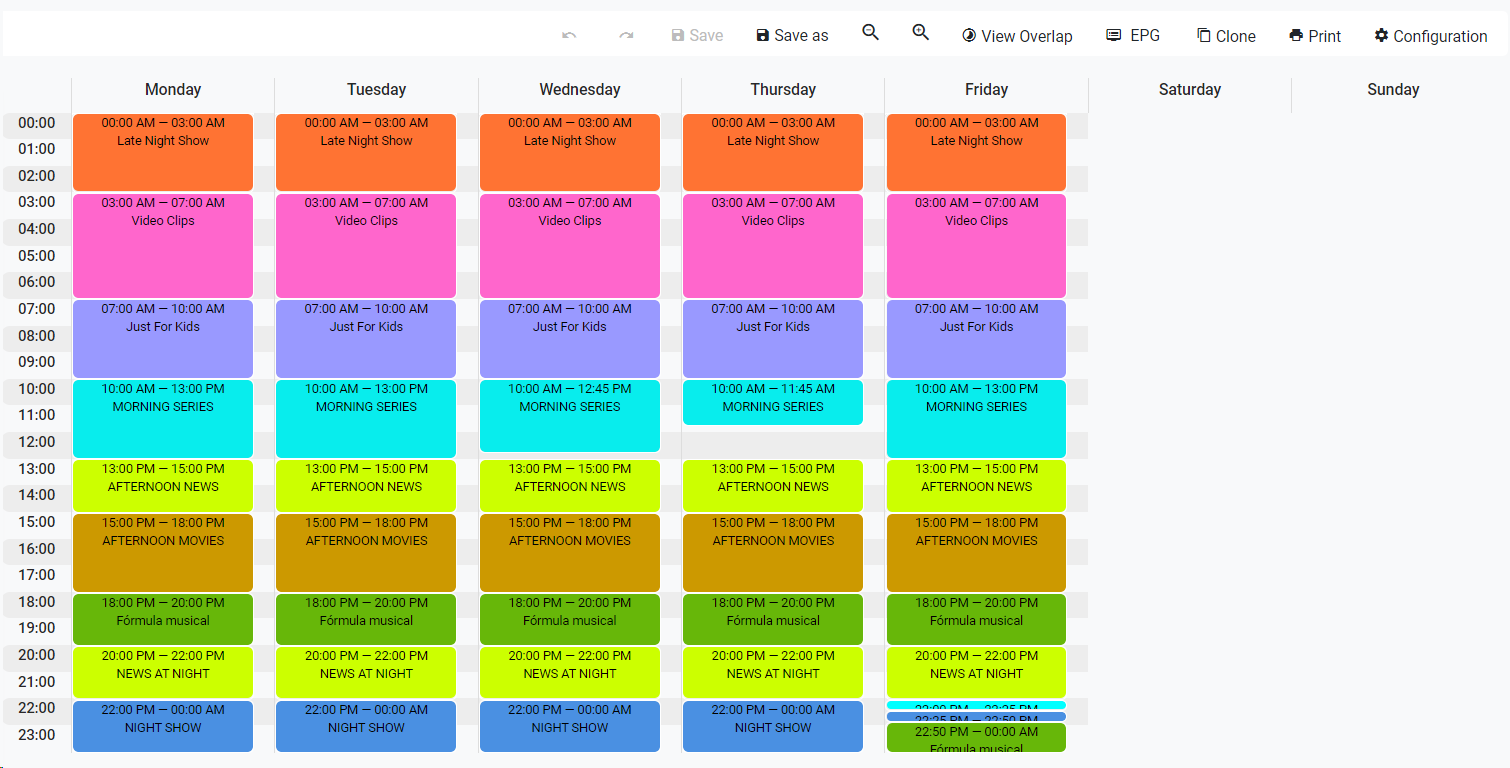
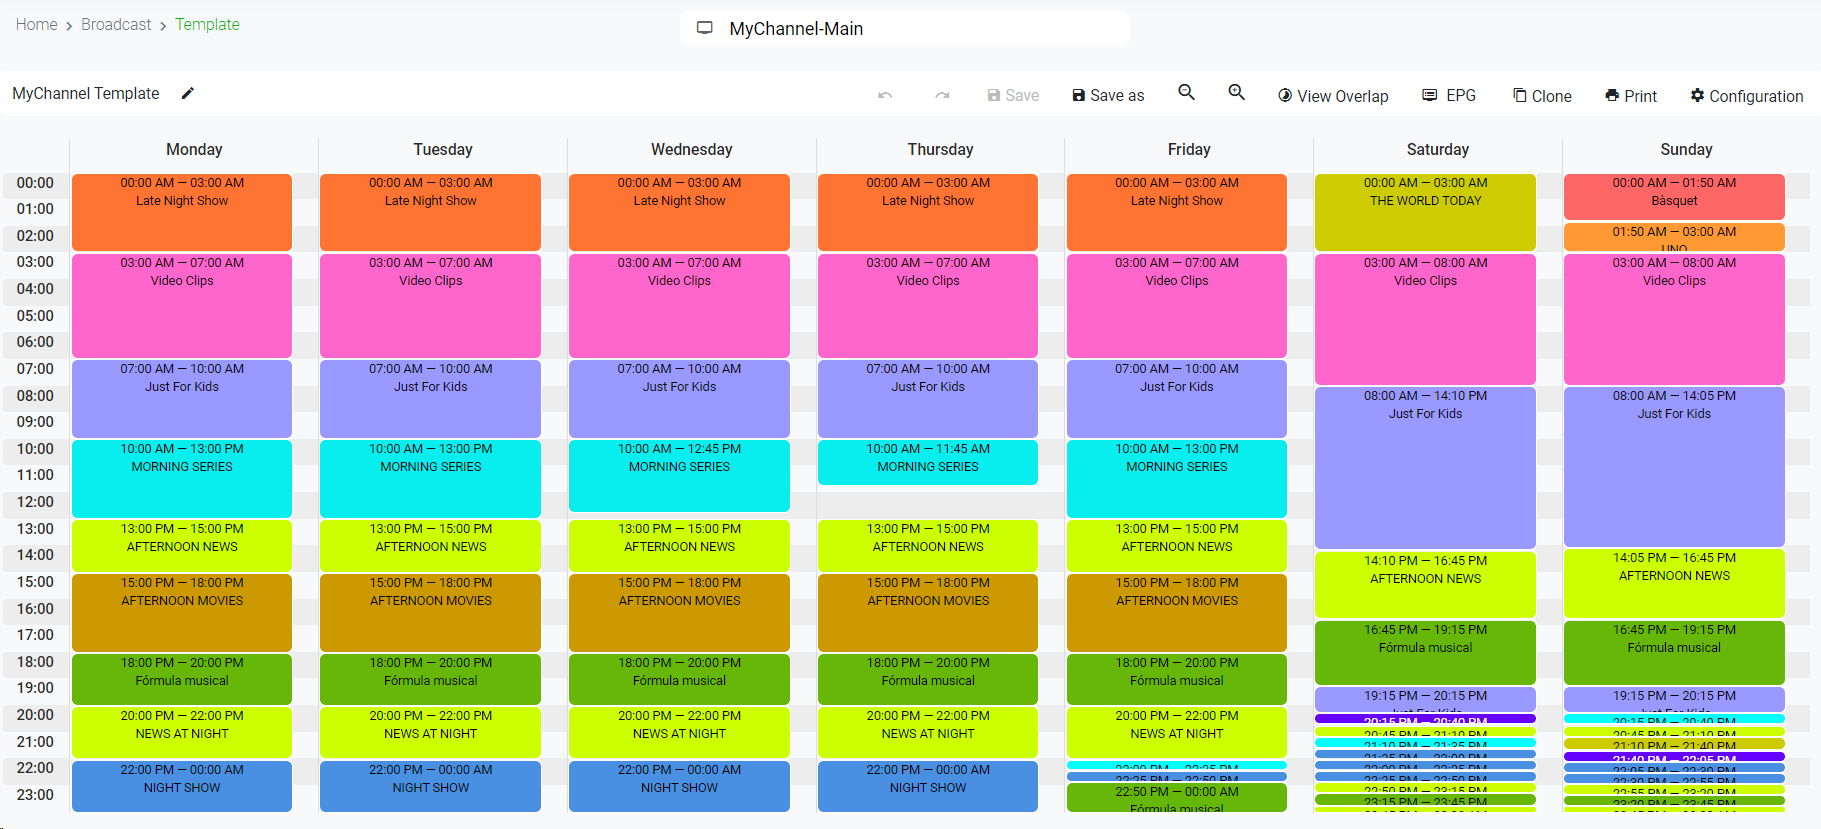
Week Days
It shows the generic days of the week. You can choose which days to show in the
Configuration
Day Hours
It shows the 24 hours of a day, corresponding to the daily playlists.
You can change the time zoom in intervals of 15 minutes using the
Zoom In / Out option
Undo / Redo Click on
to undo the last action performed in the template. You can undo an infinite number of times.
Click on
to retrieve the last undone operation. You can redo an infinite number of times.
Save
Click on "Save" to save the changes on the template
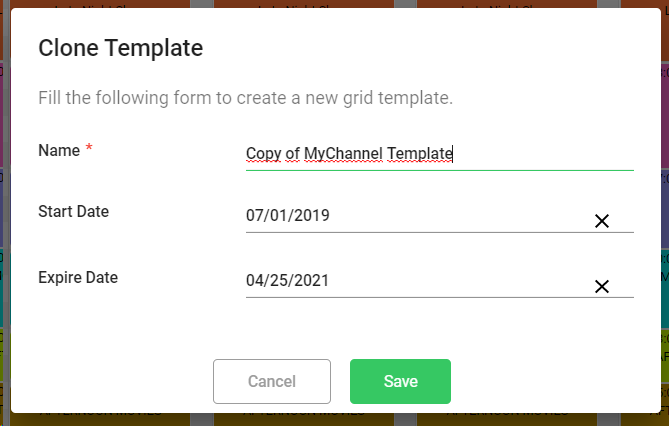
Save as Click "Save as" to clone the template. Specify a Name, Start and End Date.
Zoom In / Out Use these buttons to zoom the grid in or out in intervals of 15 minutes, respectively.
View Gaps / Overlaps
Use this option to see if there are gaps or overlaps in each block of the template grid, in a visual way. When using this option, the template grid will become in just view mode.
We will see in
grey the empty spaces
We will see in
blue the filled spaces with the pending block time (gap)
We will see in
red the filled spaces with the exceed bloc time (overlap)
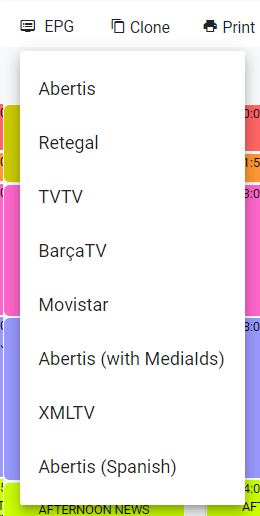
Export EPG
Click on this button to export the EPG (Electronic Program Guide) of the current template grid among the available options:
Clone Template
Click on this option to clone the template to other subchannels, with the option to also export the playlists files to a folder.
If the box is not checked, the action will not export the playlists files .
If the box is not checked, you must specify the subchannel/s from the selection list.
If the box is checked, the action will clone the template to all the subchannels of the organization.
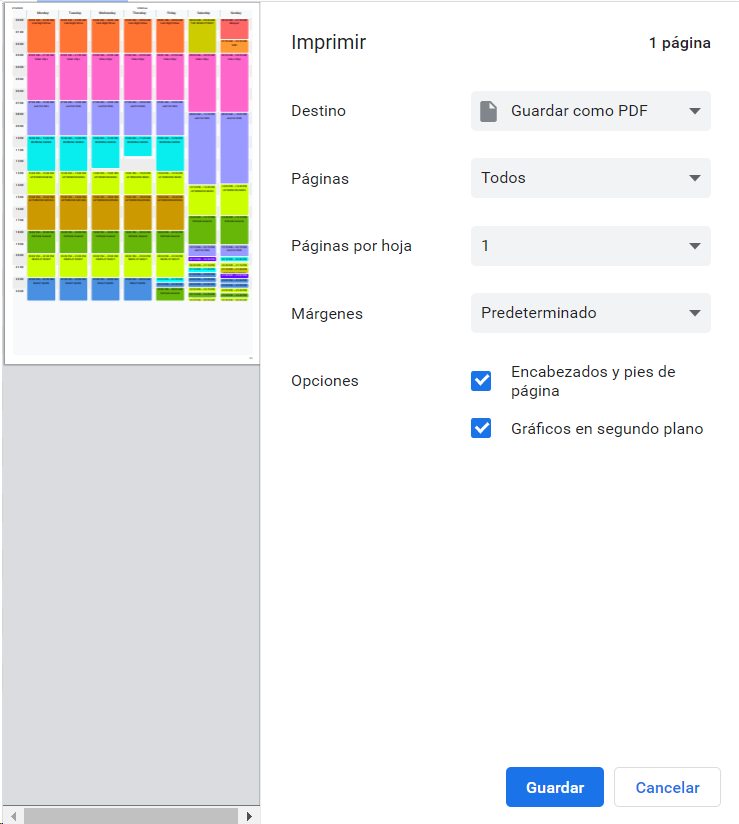
Print Template
This option will print the current template.
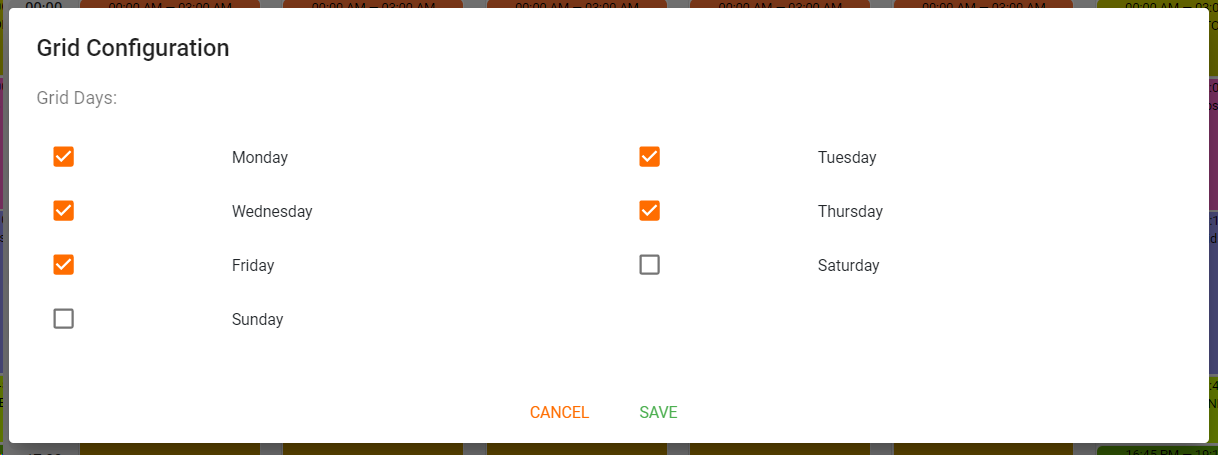
Configuration
Use this option to select the days of the week that you want to see in your template
Click
to apply the configuration
Click
to cancel the operation.
Expand / Collapse Containers Click on
to expand the container type and show its containers.
Click on
to collapse the container type and hide its containers.
Show / Hide left panel
Click
to hide the left panel and have more space to work with the weekly view.
Click
to show the left panel


 to delete the selected users, or
  to cancel the operation.
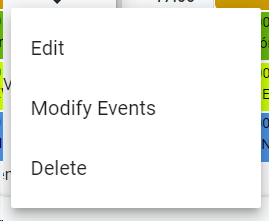
 to cancel the operation.