The Time Windows are used to specify different time zones of each of our channels. This will allow or reject specific content to be scheduled in specific intervals of time based on the audience target (such as protected time, prime time, etc.).
 Channel SelectorSelect the channel you want to view. This will enable the current Time Windows view for the selected channel.
|
 Search Time Windows
Start typing a text and click Enter. The system will show you the results matching with your query.
|
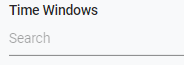
 Create new Time Window
1. Click  to create a new Time Window in the selected channel. This will open a dialog to introduce:
-
Name. Specify a name for the new Time Window.
-
Duration. Specify an initial duration of your Time Window (HH:MM:SS)
-
Color. Optionally you can set a colour to easily identify the Time Window in the weekly view
The new Time Window will appear in the list of Time Windows of the selected channel. Once finished, click "Cancel" to cancel or "Save" to save the modifications
2. To add a Time Window in the weekly view, just drag % drop it. Once in the weekly view, you can change the duration of the Time Window instance.
|
 List of Time windowsBased on your text search, this is the list of the Time Windows available for the selected channel.
|
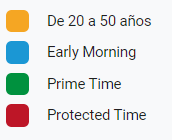
 Filter Time WindowsClick on each of the selectors of the Time Windows to show or hide them from the weekly view.
|
 Manage Time Window
You can modify or delete existing Time Windows.
-
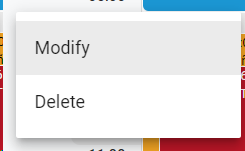
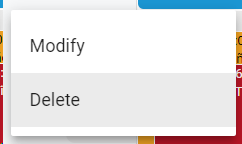
To edit a Time Window, click on  button and " Modify"
Once finished, click "Cancel" to cancel or "Save" to save the modifications
-
To delete the Time Window, click on button and " Delete"
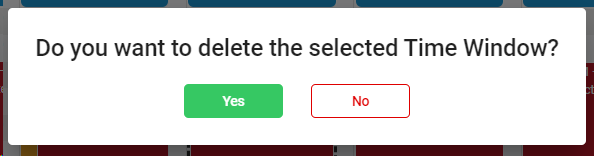
A confirmation message will appear. Click "Yes" to confirm or "No" to cancel the delete operation.
 If the element you want to delete has dependences , it won't be deleted and the system will show you a list of existing dependences
|
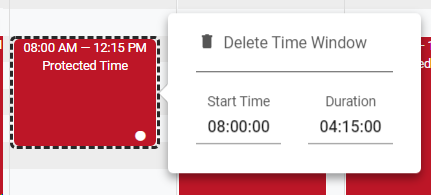
 Modify Time Window
Once a Time Window is added to the weekly view, you can modify it in different ways:
-
Adjust the length of each Time Window box using drag and drop -
Left click on any Time Window box and a new dialog will appear. You can delete the time window instance, or modify the start time and / or duration:
When modifying the time windows from the weekly view, you will be able to Undo / Redo your changes
|
 Zoom In / Out
Click on  to zoom in, or  to zoom out the weekly view, in intervals of 15 minutes each time.
|
 BreadcrumbIt shows the current page's location within a hierarchy of content to browse history and to provide the navigation tool.
|
 Undo / RedoIt is possible to undo  or redo  as many times the changes done in the Time Windows of the weekly view.
|
 SaveClick to save the changes done in the weekly view.
|
The online help was made with Dr.Explain
|