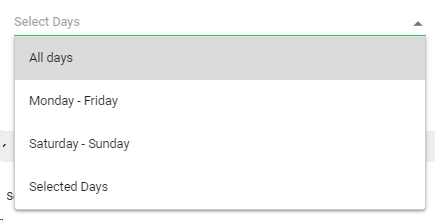
There are 2 main ways to use the automatic episodic programming to non-linear platforms for a given content:
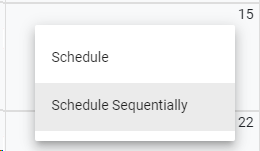
From the Non-linear Calendar view by clicking to any day of the week and selecting the "Schedule Sequentially" option
From a Content in the Catalog, clicking the icon and selecting the "Schedule Sequentially" option
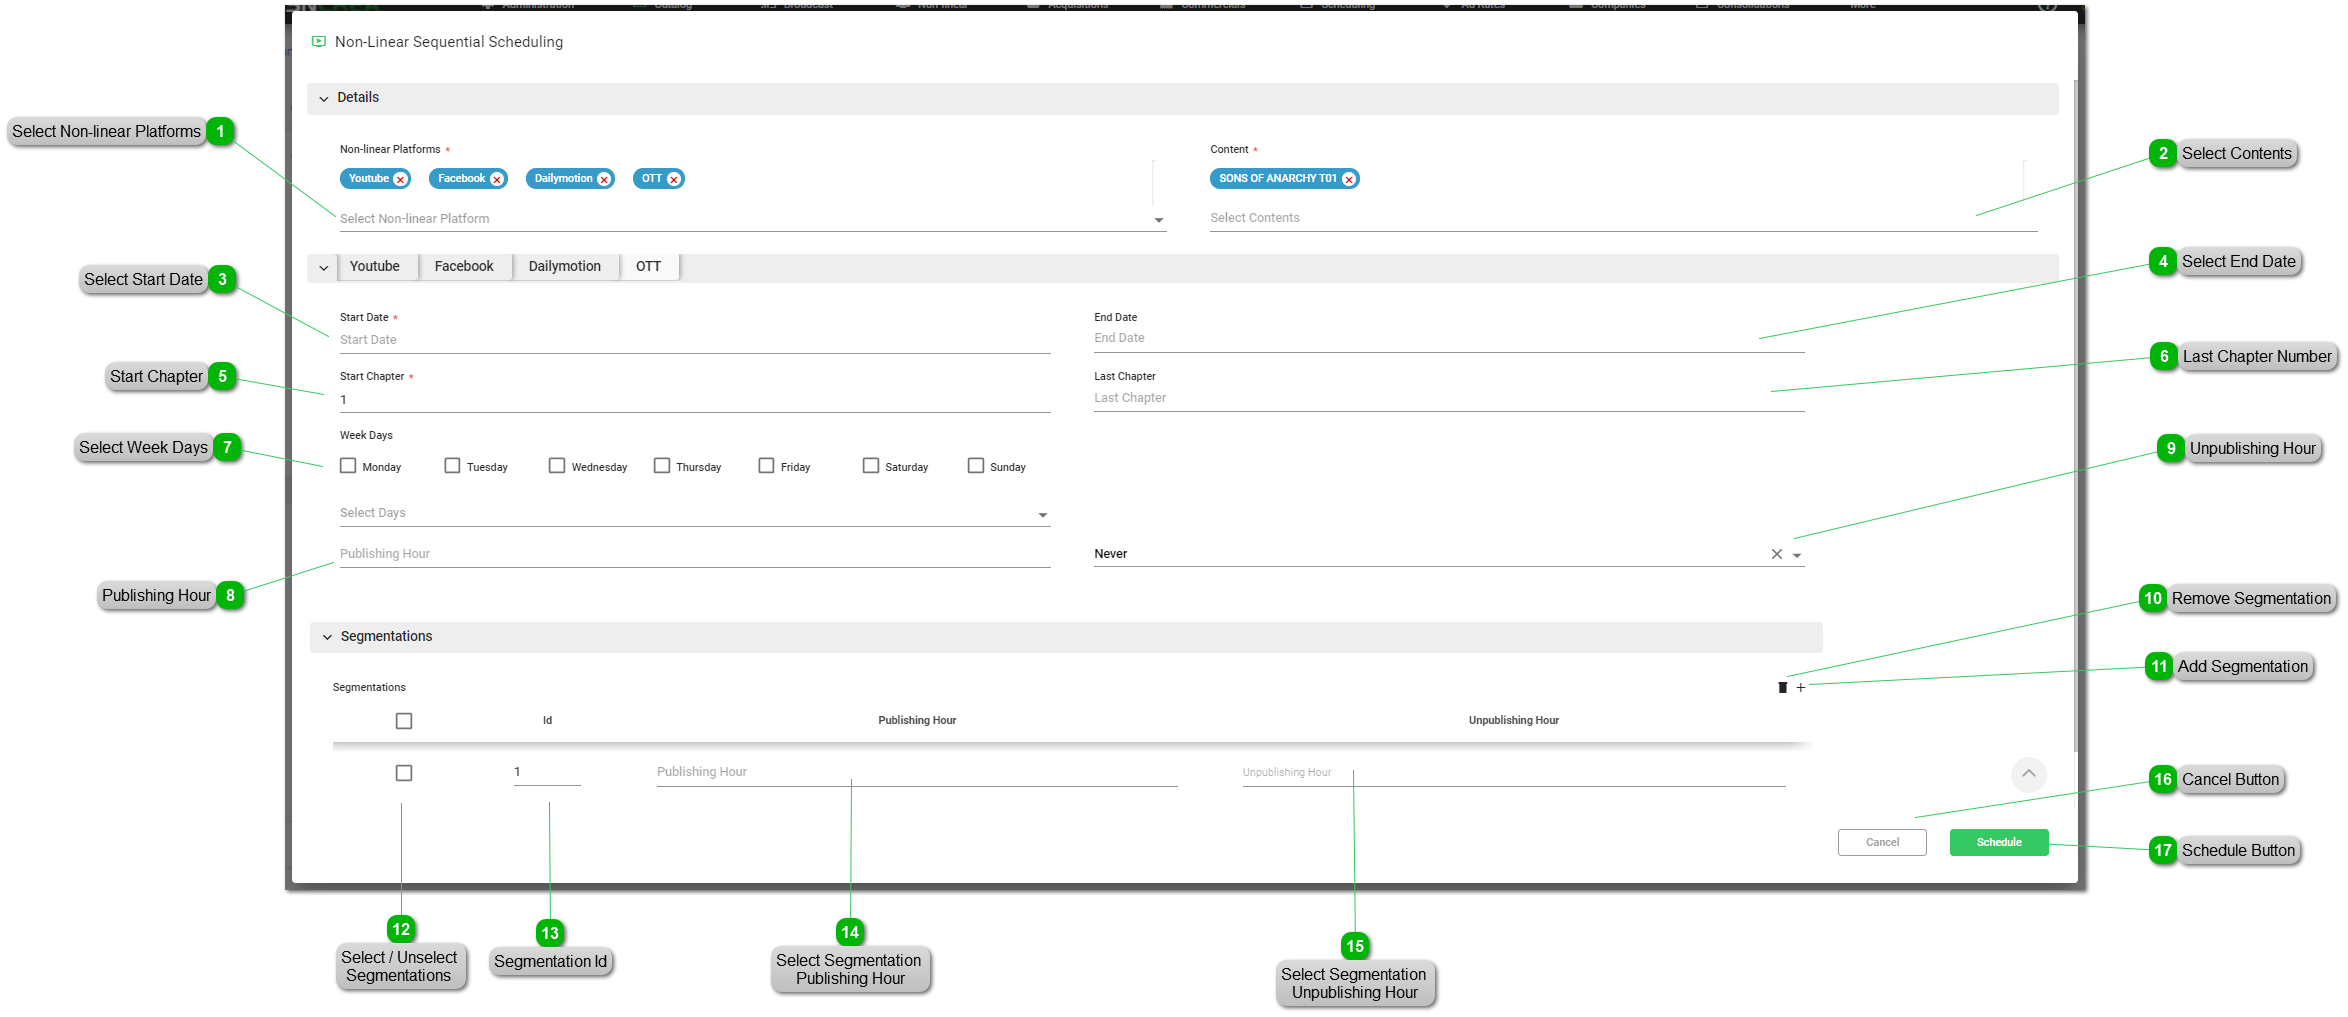
In any case, this is the window that will be opened to manage the specific non-linear sequential scheduling:
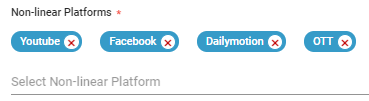
Select Non-linear Platforms
Select one or more non-linear platforms from the available ones. For each selected platform, a new tab will be opened where you can define the publication parameters.
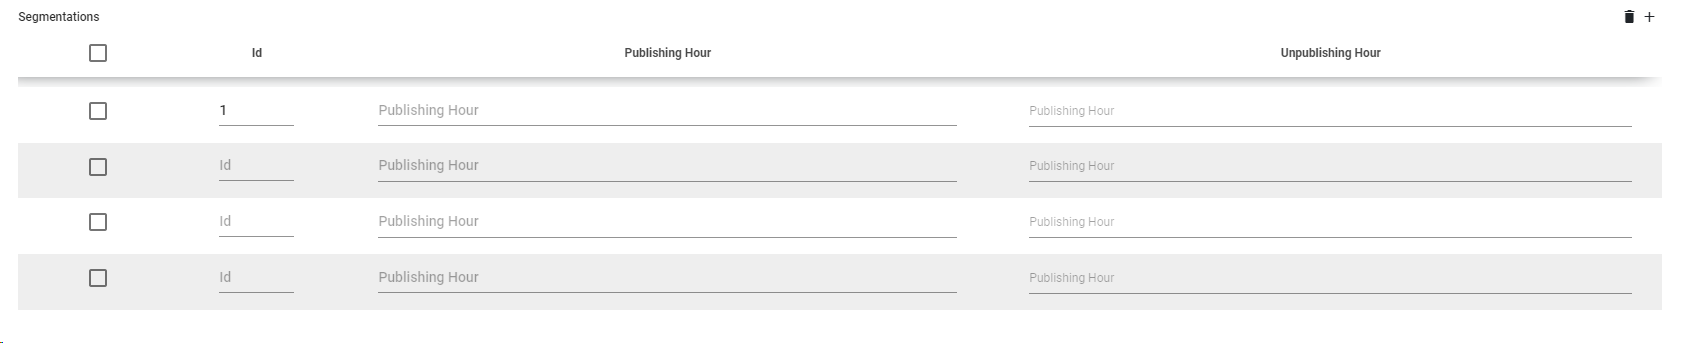
Click to add a new segmentation in the list to be included in the scheduling of each production.
For each segmentation, introduce the Id, the Publishing and the Unpublishing hour. Every media version (segmentation) can be published or unpublished at different hours.
This field corresponds to the Segmentation Id field in the catalog. When creating a Segmentation in the catalog, the Id is automatically generated in order of creation (1,2,3...,N).